
Mixing resin-bound gravel requires UV-stable polyurethane resin combined with thoroughly dried aggregates. First, lay a solid base foundation, then blend your resin and aggregate mixture in a forced action mixer – this ensures proper distribution. Spread the mixture evenly with a trowel, much like icing a cake, to achieve a level surface. Think of it as creating a robust sandwich: the base acts as your bread, whilst the resin-bound mixture forms the filling. When done properly, you'll end up with a hard-wearing surface that's both practical and attractive. The key is in the careful measuring and thorough mixing – skip either, and you'll risk a patchy finish.
Key Takeaways
Resin-bound gravel combines stone aggregates with a UV-resistant polyurethane or epoxy resin – much like mixing concrete but with more precise measurements. Think of it as creating a robust sandwich, where each stone gets a proper coating of resin.
The base must be solid and spotless, rather like preparing a garden bed before planting. You'll need proper edging installed – similar to a garden border – to keep everything neatly contained.
Getting the mix right is crucial: use a 1:1.04 ratio of hardener to resin. It's a bit like baking – the measurements need to be spot-on for the best results.
A forced action mixer is non-negotiable – regular cement mixers won't do. It's essential for coating each stone evenly, much as you'd want every crisp evenly coated in seasoning.
When laying the surface, spread the mixture to an even depth throughout. This ensures a durable finish that'll withstand everything from summer heat to winter frost, much like a well-laid patio.
Understanding the Resin-Bonding Process
The resin-bonding process boils down to choosing the right resin for your project and applying it correctly. UV-stable resins work best outdoors, as they won't break down in sunlight, whilst standard resins suit indoor jobs perfectly well. Getting the mix right is crucial – you'll typically need 1 part hardener to 1.04 parts resin for proper curing. Think of it like baking: your ingredients must be clean and properly measured. Just as you wouldn't want eggshells in your cake mix, your aggregates must be dust-free and dry for the resin to stick properly. A forced action mixer (similar to a cement mixer but gentler) ensures even coating of the resin, much like ensuring cake batter is thoroughly mixed. This attention to detail delivers a smooth, durable finish that looks spot-on, and it's essential to ensure that the aggregates are clean and dry to avoid problems with loose stone. Proper surface preparation is essential for effective resin bonding as it helps to achieve optimal results.
Preparing the Base for Resin-Bound Gravel

A solid base is crucial for resin-bound gravel's longevity. Dig down roughly 220mm, adjusting for your soil type and the surface's intended purpose.
For existing concrete bases, check they're sound – if cracked or damaged, remove them completely.
Fit strong edging around the perimeter to contain the mixture and allow for natural movement in different temperatures.
Layer at least 150mm of MOT Type 3 hardcore, and compact it thoroughly using a roller or vibrating plate. This type of hardcore is recommended for its permeability which aids in effective drainage, as it helps to create a permeable base that aligns with SUDS compliance.
Give the surface a thorough clean to remove any loose bits or soft spots. A primer coat helps the resin bond better to the base.
Getting this groundwork right prevents common problems like cracks and dips later on.
Consider your drainage needs – poor preparation often leads to puddles and uneven patches, particularly common in British weather conditions.
Overview of Materials Used in Resin-Bound Gravel
The Essential Materials for Resin-Bound Gravel
Crafting a solid resin-bound surface requires two main components: specialist resins and carefully selected aggregates. The most common resins are either epoxy or polyurethane-based, much like those used in industrial flooring. Each type brings distinct benefits – epoxy offers excellent durability whilst polyurethane provides more flexibility, particularly useful for British weather conditions. Resin bound gravel is composed of a two-part resin binder and selected aggregates, creating a hard-wearing, porous surface suitable for heavy rainfall areas. Proper mixing ratios of resin and aggregates are crucial for achieving the desired consistency and strength during installation.
Quality aggregates matter just as much as the resin. Think of them as you'd choosing gravel for your garden path – the right size, shape and mix of stones makes all the difference. Most installations use a blend of different-sized stones, typically ranging from 2mm to 6mm, to create a stable, well-draining surface.
The basic toolkit includes:
- Forced action mixer
- Trowels and squeegees
- Spirit level
- Protective gear
Resin Types Overview
Several resin types are used in resin-bound gravel installations across the UK, each with distinct qualities:
- Polyurethane Resin: Perfect for British weather conditions, offering excellent UV resistance and long-lasting durability – ideal for driveways and garden paths.
- Epoxy Resin: Delivers strong bonding properties but tends to yellow in sunlight, making it better suited for indoor spaces like garage floors.
- Two-Part Polyurethane Resin: Popular amongst UK contractors for its reliable performance, though proper mixing is crucial (much like mixing concrete).
- Tinted and Clear Resins: Available in various colours to match your property's aesthetic, from subtle earth tones to bold modern shades.
Choosing the right resin is vital for a successful installation.
For most UK homes, UV-resistant polyurethane resin proves the most practical choice, particularly given our varied weather conditions.
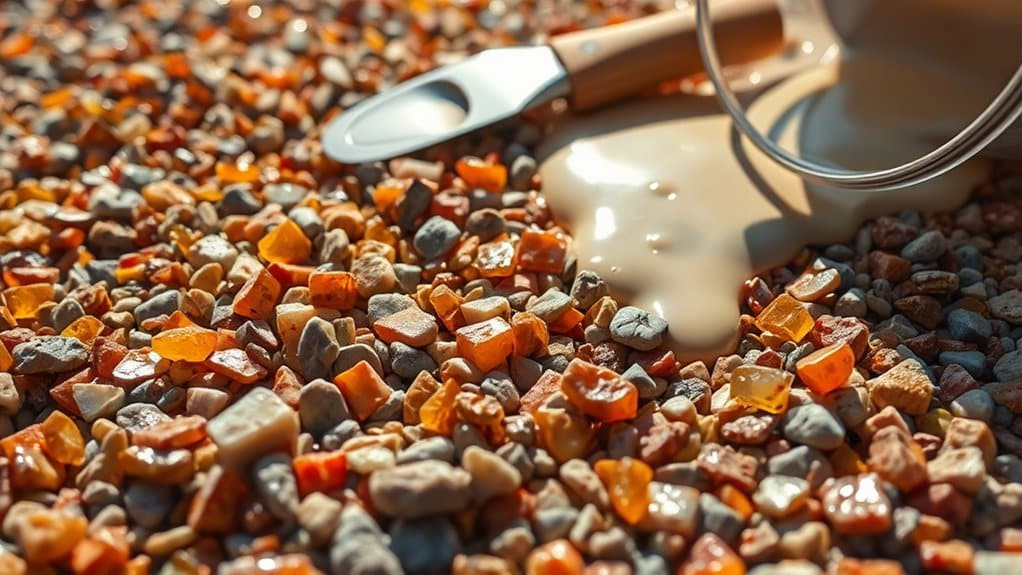
Aggregate Stone Varieties
Choosing the right stone for resin-bound gravel impacts both looks and durability. The range includes everything from subtle greys to bold reds and greens, much like picking paint colours for your home. You can source stones locally or abroad, with recycled options like crushed glass becoming increasingly popular in the UK.
For best results, stones must be clean, dry and dust-free – think of it like preparing a surface before painting. Most projects use stones between 1-3mm or 2-5mm, roughly the size of coarse sand to small pebbles.
The right choice depends on where you're laying it – a busy driveway needs tougher aggregate than a garden path.
Always check that your chosen stones work well with the existing ground surface and can handle the expected foot or vehicle traffic. This ensures your resin-bound surface stays smart and sturdy for years to come.
Essential Mixing Tools
Essential Mixing Tools
The right tools are vital for a proper resin-bound gravel installation. Quality equipment ensures better results and saves time on site:
- Forced Action Mixer: Creates an even coating of resin on stones whilst preventing clumping. Think of it as a cement mixer but specifically designed for resin work.
- Paddle Mixer: Works like an oversized hand whisk to blend resin parts thoroughly before stone mixing. Essential for achieving the correct resin consistency.
- Screed Sledge: A specialist tool that spreads the mixture evenly. Similar to a large rake but with precise depth control.
- Trowels: Standard builder's trowels work well for finishing touches and ensuring a smooth, professional surface.
Each tool serves a specific purpose, and whilst some DIYers try to cut corners with basic alternatives, professional-grade equipment makes a noticeable difference in the final result.
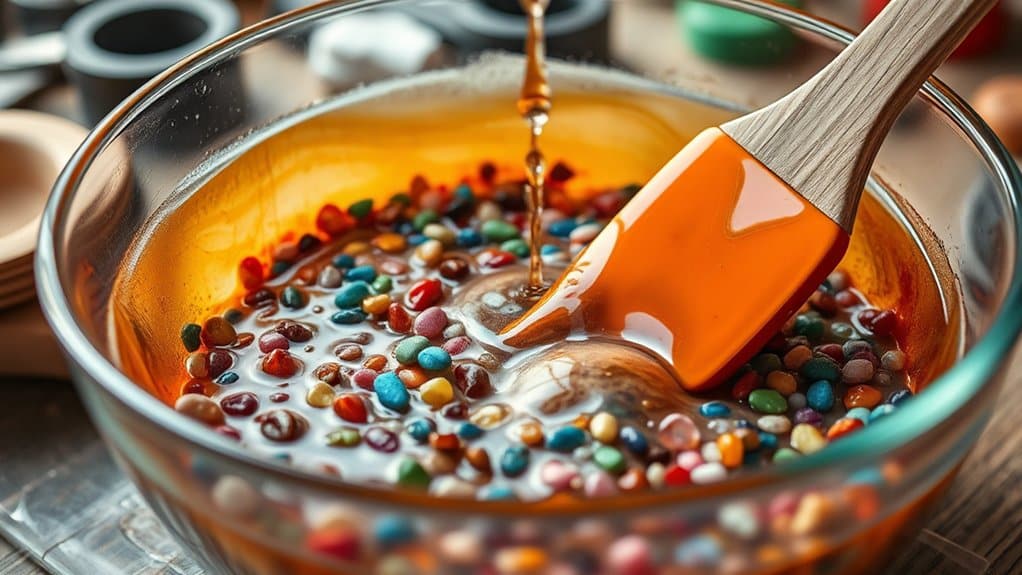
Mixing the Resin and Aggregate Components
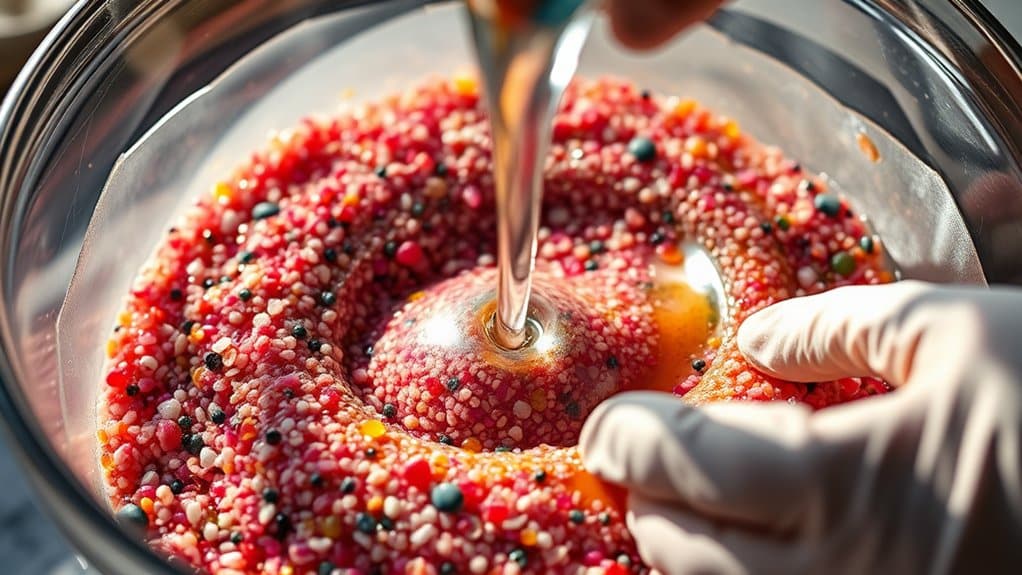
Mixing the resin and aggregate components forms a crucial step in achieving a lasting resin-bound surface. Use forced action mixers to ensure consistent results, with aggregates needing to be dry and free from dust. Mix at a ratio of 3:1 (aggregate to resin) by weight. Mind your mixing technique – too much mixing will trap unwanted air bubbles. The resin's colour change signals it's properly combined. Work swiftly, as the mixture begins to cure quickly.
| Component Type | Recommended Size | Purpose |
|---|---|---|
| Aggregate | 1-3mm / 2-5mm | Provides structure |
| Resin | Binder + Curing | Binds aggregates together |
| Mixer | Forced Action | Guarantees uniform mixture |
Step-by-Step Installation Process
Step-by-Step Installation Process
Once you've mixed the resin and aggregate components properly, follow these steps to install your resin-bound gravel surface:
- Base Preparation: Ensure a solid, clean base without debris or cracks. Use either concrete or well-compacted Type 1 aggregate – much like preparing foundations for a garden patio.
- Surface Assessment: Check the surface is stable and level. Sort out proper drainage to avoid puddles forming after rain.
- Support Structure: Install a grid system to boost stability and help water drain away effectively.
- Laying the Mixture: Spread the resin-bound gravel mix evenly across the surface. Aim for consistent thickness, like spreading butter on toast, to achieve a smooth finish.
Proper installation creates a lasting surface that looks brilliant and works well in British weather conditions.
Maintenance and Care for Resin-Bound Surfaces

Regular upkeep of resin-bound surfaces is essential for lasting quality and performance. Clean spills straight away, sweep regularly to remove debris and pressure wash twice yearly.
Watch for cracks or loose stones, particularly after winter, and sort repairs quickly to prevent further damage.
In autumn, clear fallen leaves promptly to avoid staining, whilst in winter, use white rock salt rather than grit for ice treatment.
For everyday cleaning, a simple brush and occasional wash with soapy water will keep your surface looking smart.
Should you spot any issues like small cracks or dips, it's best to contact your installer rather than attempt DIY fixes, as improper repairs might void your warranty.
Routine Cleaning Practices
Keeping Resin-Bound Surfaces Clean
Essential cleaning steps for your resin-bound surfaces:
- Regular Sweeping: Use a stiff-bristled broom to clear leaves and debris. Step up the sweeping during autumn when leaves are falling.
- Water Rinse: Simply hose down the surface to remove loose dirt – stick to cold or tepid water, much like washing your car.
- Thorough Clean: Mix washing-up liquid with warm water, scrub in circles, then rinse thoroughly.
- Pressure Washing: Every 2-3 years, give it a proper clean with a pressure washer on a gentle setting. Always test on a small corner first, just as you'd with new cleaning products on your patio.
Regular cleaning prevents build-up and keeps your surface looking fresh whilst protecting your investment.
Repairing Surface Damage
Regular cleaning helps protect resin-bound surfaces, but wear and tear is inevitable.
First, check how bad any cracks are – small hairline cracks need different treatment than larger ones.
Give the area a thorough pressure wash to shift dirt and loose bits.
Take a chisel to the cracks to widen them slightly and clean them out – this helps the repair bond properly.
Fill the clean cracks with resin or epoxy filler (your local DIY shop can advise on the best product).
For loose stones, stick them back down with fresh resin and use a heat gun to set them level with the rest of the surface.
Like checking your car's tyres, regular checks of your resin surface help spot problems before they get worse.
Seasonal Maintenance Tips
Seasonal Care for Resin-Bound Surfaces
Weather changes affect resin-bound surfaces throughout the year. A proper maintenance schedule keeps them looking smart and lasting longer.
Key tasks for each season:
- Autumn: Sweep up leaves straight away to stop staining.
- Winter: Clear ice with salt or grit, use a plastic shovel for snow.
- Spring: Give surfaces a good clean to shift winter muck.
- Summer: Check for any damage or worn patches.
Year-round care:
- Avoid parking heavy vehicles.
- Don't use harsh cleaning products.
- Sweep regularly.
- Pressure wash twice yearly.
Following these basic steps helps protect your resin-bound surface, no matter the weather.
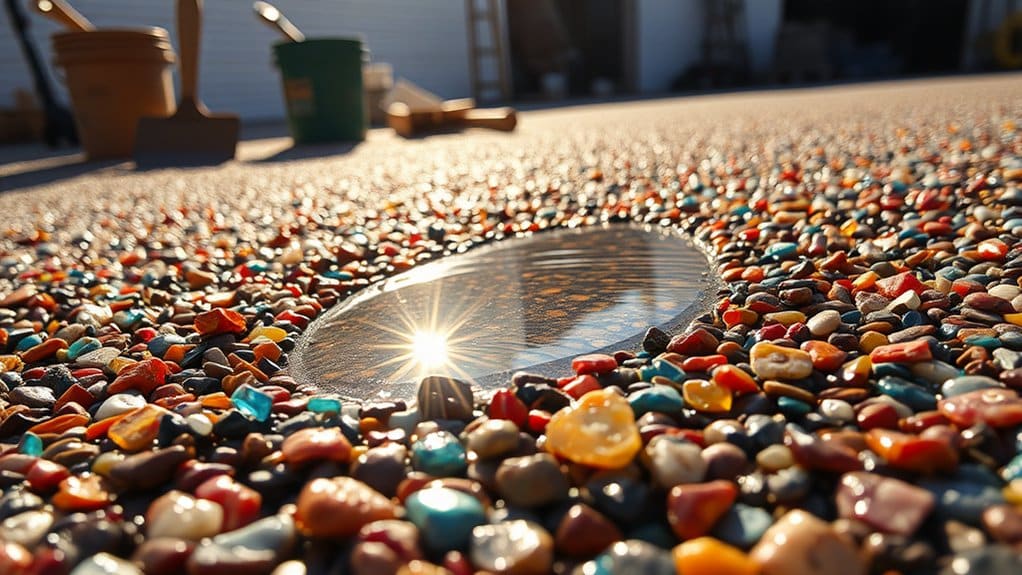
Benefits and Longevity of Resin-Bound Gravel

Resin-bound gravel offers excellent value for driveways and paths across the UK. The smooth, crack-resistant surface needs little maintenance – just an occasional sweep and power wash will do. You can choose from countless colours and finishes to match your property, from warm honey tones to classic grey blends.
The system works brilliantly with our British weather, as its porous structure lets rainwater drain away naturally, helping prevent puddles and flooding. Think of it as a giant sponge for your driveway.
With proper installation and basic care, you'll get 15-30 years of service, even with daily car use and our varied climate.
The non-slip surface proves particularly useful during wet autumn days and frosty winter mornings, making it safe for both home driveways and business car parks.
Unlike loose gravel that can scatter or tarmac that might crack, resin-bound stays put and looks smart year after year.
Frequently Asked Questions
How Long Does the Resin Curing Process Take?
The resin curing process typically takes 24-48 hours before you can properly use the piece. Think of it like waiting for paint to dry – whilst it might feel dry to touch earlier, patience ensures the best results. Temperature plays a crucial role; a warm room around 20°C helps achieve optimal curing, whilst cold or excessive heat can affect the final quality.
Can Resin-Bound Gravel Be Installed in Cold Weather?
Installing resin-bound gravel in cold weather is tricky business. The temperature must stay above 5°C for proper curing – think British autumn to spring conditions. Below this, you'll risk poor bonding and a compromised surface that won't stand up to daily use. Much like how paint needs the right conditions to dry properly, resin needs warmth to create a solid, lasting finish.
Is Resin-Bound Gravel Suitable for DIY Installation?
Resin-bound gravel suits DIY installation, but demands proper preparation and attention to detail. Essential requirements include a solid base (typically concrete or asphalt) and precise mixing of resin with aggregate. Whilst manageable for competent DIYers, particularly on smaller areas like garden paths, larger projects might warrant professional installation. Think of it like mixing cake ingredients – get the proportions wrong, and the result won't set properly. If you're unsure about tackling it yourself, best contact a specialist.
What Colors Are Available for Resin-Bound Gravel?
Natural tones dominate resin-bound gravel options in the UK, from classic buff and golden shades to modern slate greys and charcoal. Popular choices include warm terracotta, subtle cream, and rich browns – similar to traditional garden stones. The colour range suits both period properties and contemporary homes, with darker shades particularly practical for high-traffic areas where dirt is a concern.
Does Resin-Bound Gravel Fade Over Time?
Resin-bound gravel does fade over time, particularly in areas exposed to strong sunlight. Much like garden furniture or decking, UV rays gradually affect the resin's colour. Quality UV-resistant resins and proper installation by qualified professionals help maintain the surface's appearance for longer. For the best results, choose a trusted local contractor who uses premium materials suited to the British climate.
Conclusion
To sum up, resin-bound gravel combines toughness and visual appeal, making ordinary driveways and paths rather special. Getting the basics right – proper resin mixing, solid groundwork and quality stones – ensures a top result. Much like a well-laid patio, these surfaces cope brilliantly with British weather and heavy use. It's a sound investment that boosts property value and, when properly installed, will serve you well for years to come.