
A resin-bound gravel driveway transforms both the look and practicality of your home’s entrance. The process starts with proper base preparation – essential for a lasting finish. Choose stones that match your property’s character, whether that’s a warm Cotswold blend or sleek granite mix. Getting the resin-to-aggregate ratio spot-on is crucial, and installation needs dry weather and the right temperature. Whilst there might be initial hurdles, like working around drain covers, the end result is worth it: you’ll have a smart, puddle-free surface that needs minimal upkeep. The finished driveway not only looks sharp but also helps with rainwater drainage, ticking both practical and aesthetic boxes.
Key Takeaways
Resin-bound gravel driveways boost your home’s kerb appeal with their smooth, polished finish, working brilliantly with both modern and traditional properties.
Getting it right starts with proper groundwork – think of it like laying foundations for a house. The surface needs thorough preparation, and you’ll want to choose materials that suit both your style and our British weather.
UV-stable resin is essential for our climate – it won’t turn yellow in the sun like cheaper alternatives might. Pair it with quality aggregates, and you’ve got a surface that’ll handle everything from summer heat to winter frost.
Looking after your driveway isn’t complicated – a quick brush every few weeks and a proper clean twice a year will keep it looking sharp. Think of it like maintaining your car – little and often does the trick.
Best of all, these driveways are SUDS compliant, meaning rainwater drains away naturally through the surface. This means no puddles and no need for extra planning permission – particularly handy given our rainy weather.
Overview of the Project
This driveway renovation project focused on installing resin-bound gravel to create an attractive, long-lasting surface.
The main goals were to boost kerb appeal whilst ensuring minimal upkeep. Taking cues from modern garden design, the project aimed for a clean, consistent finish that would complement the house’s existing style. Ensuring a strong base is crucial for the longevity and durability of the resin-bound gravel surface. Additionally, the installation will leverage permeability and drainage benefits to alleviate flood risks in the area.
Resin-bound gravel was chosen for its proven track record in British weather conditions, from summer heat to winter frost.
As a SUDS-compliant surface, it allows rainwater to drain naturally, making it an environmentally sound choice.
Much like a well-fitted suit, the finished driveway would be both practical and smart-looking, adding genuine value to the property.
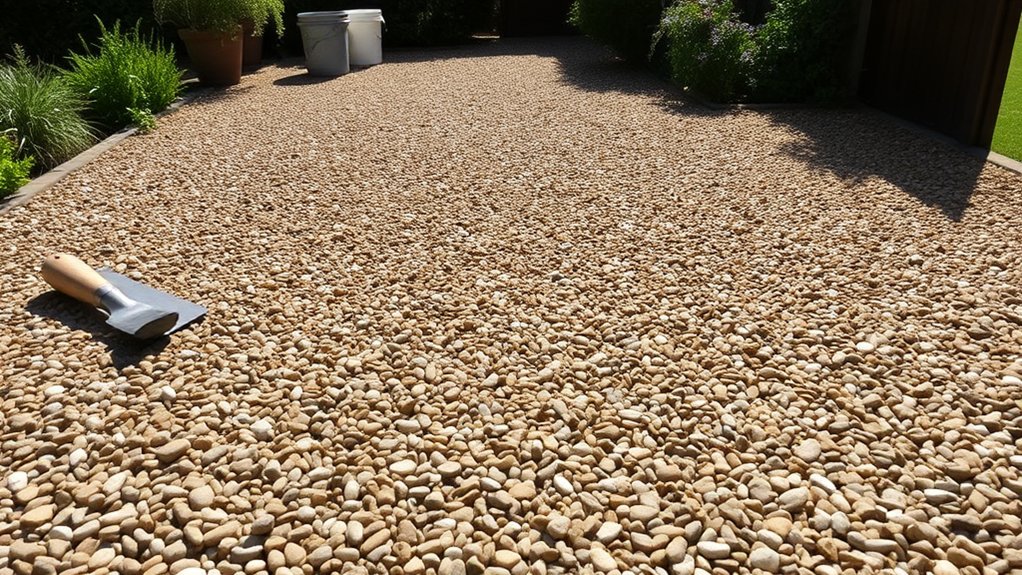
Preparation of the Base
Clean your driveway surface thoroughly before starting the installation. A spotless base is crucial for proper bonding with the resin material.
Get rid of all dirt, loose stones and any oily patches – a pressure washer works brilliantly for this job. Taking time with this prep work will make your new driveway last much longer and perform better. Additionally, using MOT Type 1 aggregate as a sub-base will provide excellent load-bearing capacity for your new surface, ensuring effective drainage and preventing damage over time.
Think of it like painting a wall – you wouldn’t skip the cleaning and sanding, would you?
Surface Cleaning Importance
Surface Cleaning: Essential Steps
Proper surface cleaning isn’t just about appearances – it’s crucial for your resin-bound driveway’s longevity and performance. Think of it as preparing a wall before painting; the end result depends heavily on your groundwork.
Key benefits:
- Regular brushing and water cleaning stops muck and moss from taking hold.
- Set cleaning routines (weekly sweep, seasonal deep clean) maintain the surface.
- Tackle spills straight away – oil and fuel stains become stubborn if left.
- Regular inspections for early detection of issues can help prevent costly repairs.
Additionally, if moss and algae develop in shaded areas, they can significantly detract from the surface’s performance.
A well-maintained driveway not only looks smart but also saves money on repairs down the line.
Much like keeping your car serviced, prevention beats cure when it comes to driveway care.
Priming for Adhesion
Proper priming is vital for a lasting resin-bound driveway. The right primer choice depends on your base material – concrete or tarmac. A quality primer creates a strong bond between your base and the resin-bound surface, much like how paint primer helps paint stick to walls.
For concrete bases, both new and old, priming is a must. With tarmac, you’ll need to check its condition first – newer surfaces mightn’t need it, whilst older ones typically do. Always prime just before laying the resin mixture for the best grip.
Good adhesion starts with thorough base preparation. Ensure your base is properly compacted and has suitable drainage before priming.
These basic steps might seem tedious, but they’re essential for a driveway that stays solid for years to come.
Material Selection for the Driveway
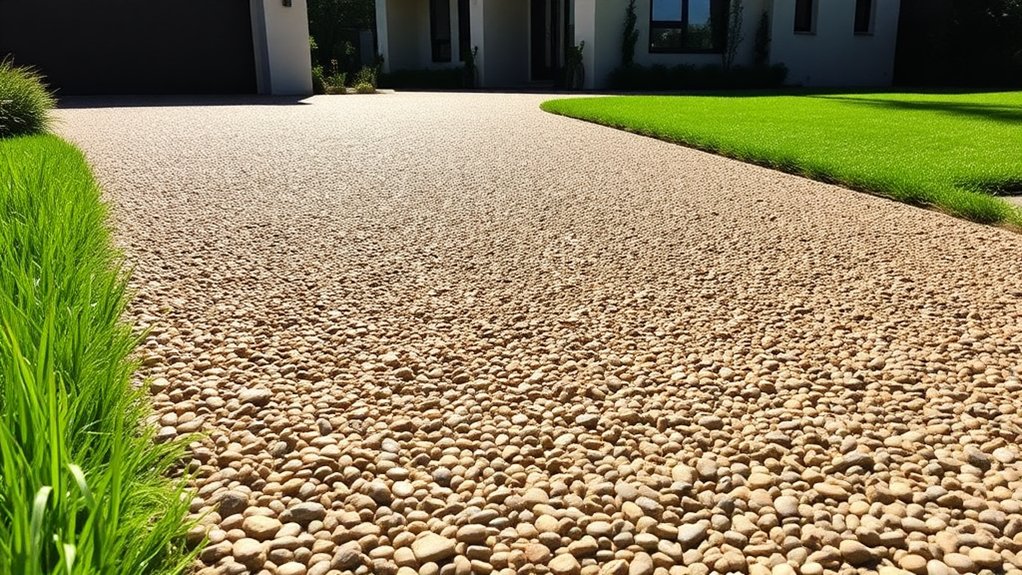
Choosing Driveway Materials
Pick aggregates that match your home’s style, considering their colour, size and texture. Quality resin is crucial – opt for UV-stable varieties that won’t yellow over time, particularly important for British weather.
A blend of 2-5mm stones works well for most UK driveways, providing good grip in wet conditions. Match lighter stones with red-brick houses or darker aggregates with modern properties for a cohesive look.
The right combination of materials ensures your driveway remains practical and smart-looking through years of British summers and winters.
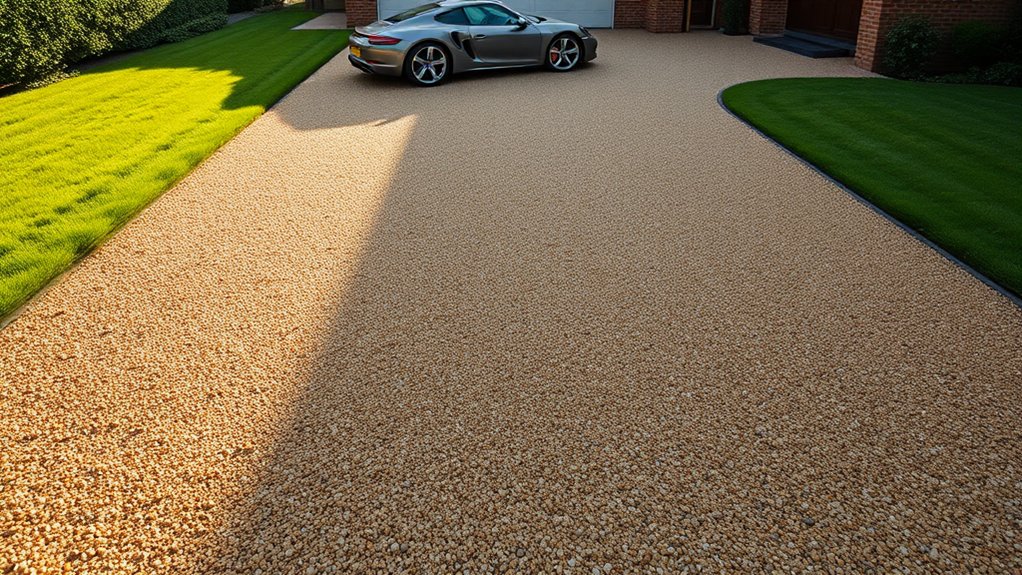
Aggregate Color Options
Choosing Your Aggregate Colour
The right aggregate colour for your driveway boosts kerb appeal and fits naturally with your property’s surroundings. From our 40+ colour options, you can select shades that work year-round in British weather conditions:
- Contemporary or Classic: Black and white suit modern homes, whilst natural browns and greys match traditional properties.
- Practical Choices: Light colours show dirt more readily but open up small spaces; dark colours hide marks better and need less cleaning.
- Mixed Options: Combine colours to create distinctive looks, like granite-effect or Portland stone finishes.
The ideal colour transforms your driveway from purely functional to a proper feature of your home.
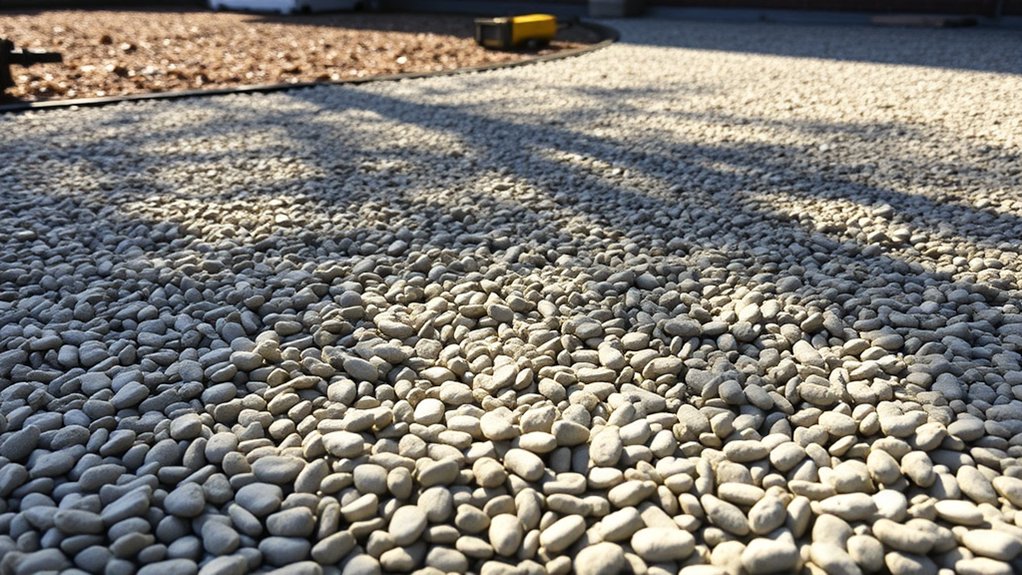
Size and Texture
Size and texture are crucial factors when choosing aggregates for your resin driveway. Most aggregates used in the UK measure between 1-6 mm, with popular blends of 2-5 mm or 1-3 mm creating an even finish.
Different textures not only make your driveway look better but also provide essential grip and strength.
You’ll need at least 18 mm depth for a stable surface, though you might need more for larger stones. Always use clean, dry aggregates – they’ll bond properly with the resin, giving you a tough surface that handles cars and British weather without trouble.
Remember: the right combination of size and texture will give you a driveway that’s both practical and good-looking. A local supplier can show you samples to help you choose what works best for your home.
Resin Quality Considerations
Choosing Quality Resin Materials
A first-rate resin driveway depends entirely on using proper materials and correct mixing ratios. The right choices ensure lasting performance and value for money:
- Polyurethane Binders: Select a proven two-part polyurethane system, such as DALTEX UVR. These British-tested systems cope brilliantly with our weather.
- Aggregate Selection: Source clean, dried aggregates from established UK suppliers. Much like brewing a proper cuppa, quality ingredients make all the difference.
- Mix Proportions: Stick to 7.05% resin content in your total mixture. Too much or too little resin can lead to problems, rather like getting the milk-to-tea ratio wrong.
The best installations use premium materials from the start – skimping on quality inevitably leads to costly repairs down the line.
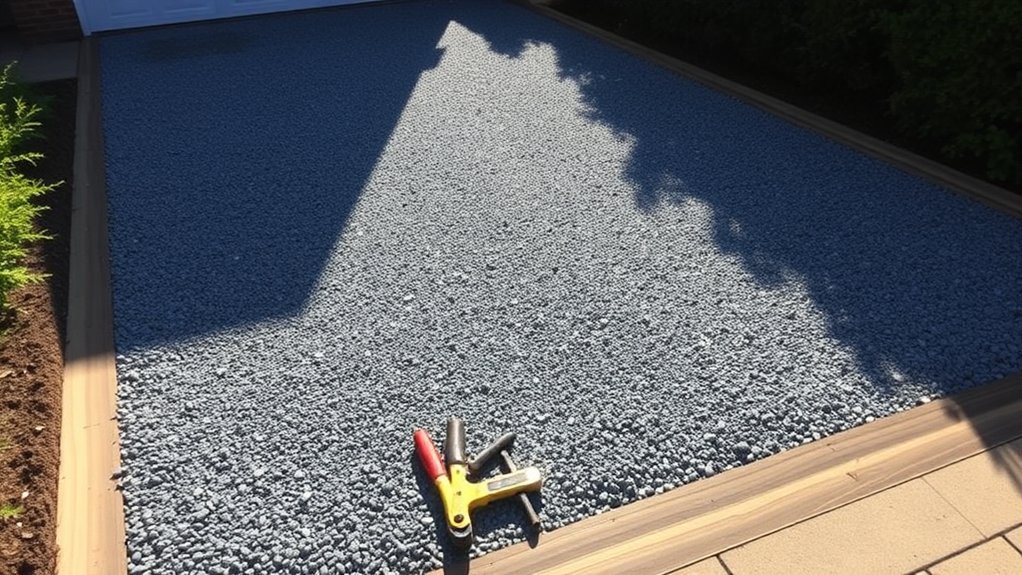
Mixing and Application Process
Essential Steps for Resin-Bound Gravel Mixing
Mix resin Parts A and B using heavy-duty mixers on a protective sheet. Start with Part A (10-20 seconds), add Part B, then mix for a further minute.
In cold weather, add an accelerator to speed up curing – think of it like adding yeast to bread dough to help it rise faster.
Pour the mixed resin into clean, dried aggregates in a forced action mixer until stones are evenly coated. Think pudding mixture coating dried fruit – you want that same thorough coverage.
Tip the mixture into a wheelbarrow and spread onto your prepared base straight away. Use a trowel to create a smooth, level finish, much like icing a cake.
Remember to clean your tools between batches to maintain quality.
Pro tip: Always work in manageable sections and keep an eye on temperature – just as you wouldn’t lay concrete in freezing conditions, resin needs the right environment to set properly.
Challenges Faced During Installation
Challenges Faced During Installation
Several key challenges crop up when installing a resin-bound driveway, and each can significantly affect your final result:
- Material Cost: Premium resin and aggregates aren’t cheap – expect to pay more for quality materials that last.
- Insufficient Depth: Laying resin thinner than 15mm often leads to cracking and surface damage.
- Weather Impact: British weather poses real issues – rain and extreme temps can ruin the installation.
To tackle these challenges head-on:
- Choose UV-stable resin to prevent yellowing in sunlight.
- Pick the right aggregate size for your needs.
- Ensure your base is properly levelled.
- Get experienced installers who know their trade.
A properly planned installation by qualified professionals will help dodge these common pitfalls and ensure your driveway stands the test of time.
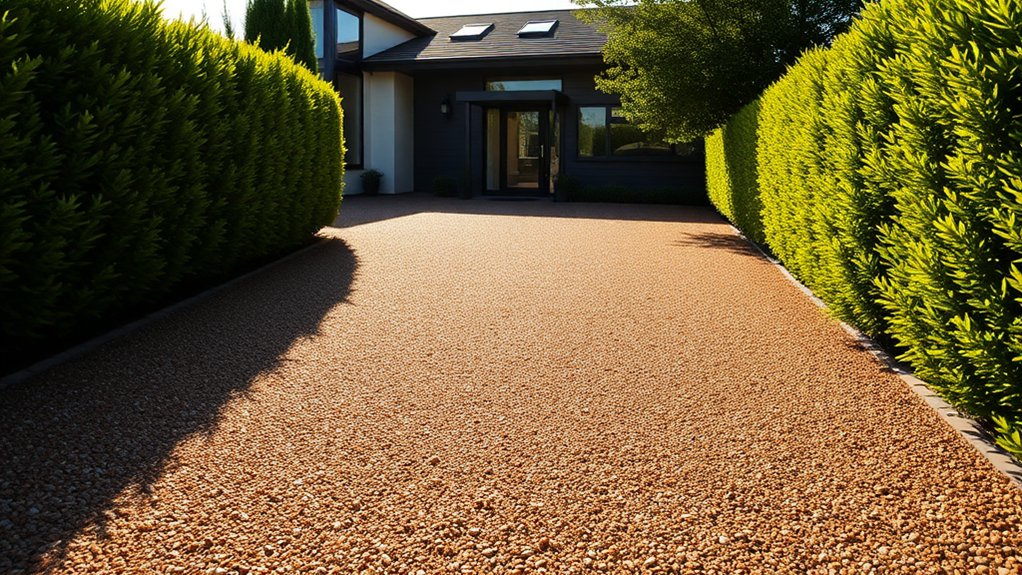
Final Result and Aesthetic Appeal
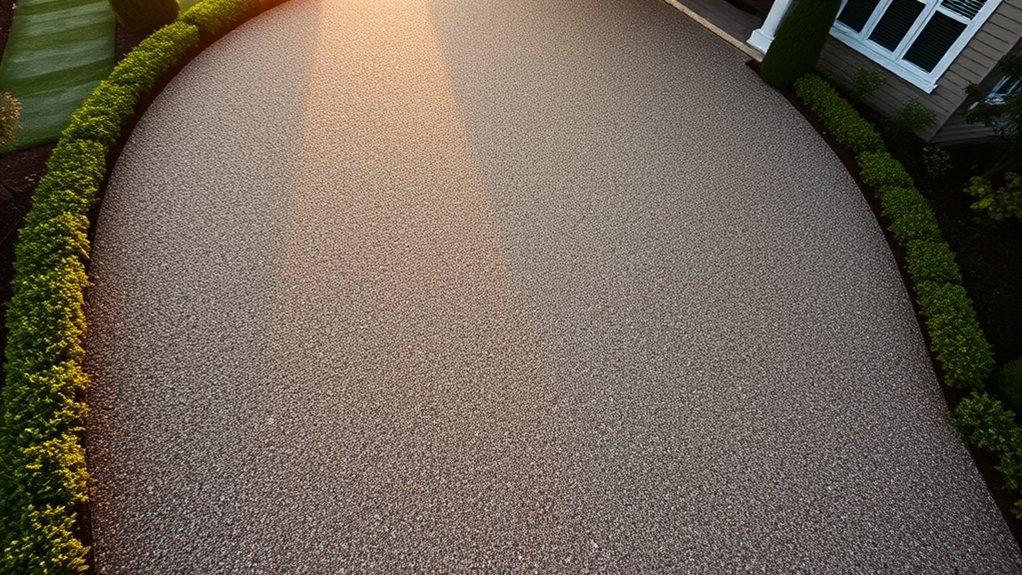
The visual impact of resin-bound gravel transforms any driveway into a striking feature of your home.
With countless colour and texture combinations available, you can easily match your home’s style, whether it’s a modern new-build or period property.
The smooth, seamless finish looks far smarter than traditional gravel or concrete, whilst different aggregate blends create truly distinctive patterns.
Your neighbours will certainly notice the difference – many homeowners find their resin driveways become a real talking point on their street.
Best of all, the finished look stays neat and tidy year-round, maintaining your property’s kerb appeal without the mess of loose stones.
Benefits of the Resin-Bound Gravel Driveway
Resin-bound gravel driveways pack several practical benefits worth considering for your home.
Built to last, they handle daily wear and tear brilliantly, standing up to both family cars and Britain’s unpredictable weather. With proper care, expect yours to serve you well for 15-25 years.
The environmental perks are particularly relevant for UK homeowners:
- Permeability: Rather than causing puddles like concrete, these driveways let rainwater drain naturally into the ground.
- SUDS Compliance: Meet current drainage regulations without the faff of seeking planning permission.
- Temperature Control: The lighter surface bounces off sunlight, keeping your driveway and surrounding area cooler during summer months.
Think of it as a practical investment that ticks both the durability and eco-friendly boxes whilst looking smart on your property.
Frequently Asked Questions
How Long Does a Resin-Bound Gravel Driveway Last?
A properly installed resin-bound gravel driveway typically lasts 15-20 years, though many driveways in the UK perform well beyond this timeframe. The key to longevity lies in quality materials and professional installation by accredited contractors. Regular maintenance, including annual pressure washing and resealing every 4-5 years, keeps the surface looking fresh and prevents common issues like weed growth or loose stones. Much like caring for a garden path, simple upkeep ensures your driveway remains durable and attractive throughout its lifespan.
Can I Install Resin-Bound Gravel Myself?
Yes, resin-bound gravel can be installed as a DIY project, but you’ll need proper tools, including a forced action mixer and suitable trowels. The key is thorough preparation and following the installation steps precisely for a lasting finish. For best results, work on dry days above 5°C and ensure your base is properly prepared.
What Colors and Textures Are Available for Resin-Bound Gravel?
A wide range of colours is available, spanning natural stone shades through to striking reds, with texture choices from fine to medium stones. Mix and match these options to create practical, attractive surfaces that suit your outdoor space.
Is Resin-Bound Gravel Suitable for Heavy Vehicles?
Resin-bound gravel is suitable for heavy vehicles when properly installed, handling weights up to 7.5 tonnes. Think of delivery lorries or small commercial vehicles – this surface can manage their weight without cracking or breaking. With correct installation and regular maintenance, it’s a reliable option for areas that need to withstand frequent heavy traffic.
How Does Weather Affect the Installation Process?
Weather plays a vital role in your installation process. For best results, install in temperatures between 10°C and 25°C. Rain and high humidity are your main concerns – too much moisture can weaken adhesives and affect your project’s longevity. Think of it like hanging wallpaper on a steamy day – it simply won’t stick properly.
Conclusion
The installation of resin-bound gravel transforms a standard driveway into a standout feature of your home. Through proper groundwork, quality materials and expert application, you’ll achieve a durable, attractive surface that boosts kerb appeal. Whilst installation can be tricky – rather like laying a perfect patio – the finished product offers excellent value. Think of it as upgrading from a basic mobile to a premium smartphone – you’re investing in both looks and performance. The surface withstands British weather brilliantly, requires minimal upkeep and enhances your property’s overall appearance, making it a sound choice for UK homeowners.