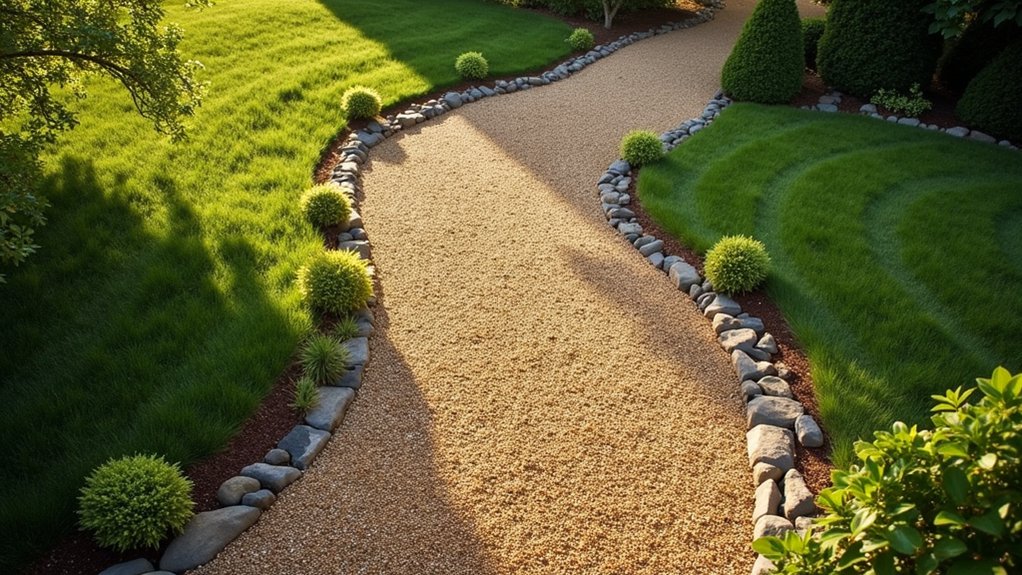
Proper resin-bound gravel installation on slopes requires careful planning and execution. The ideal gradient ranges between 1:12 and 1:40 – think of a gentle driveway slope rather than a steep hill. Before starting, ensure you’ve got a solid sub-base, much like preparing foundations for a garden patio. The drainage must cope with British weather, so incorporate suitable channels and soakaways.
Choose gravel with good grip properties – angular stones work better than smooth pebbles. When laying, always work upwards from the bottom of the slope, similar to tiling a wall. Anti-slip additives are worth considering, particularly for steeper sections.
The surface needs regular checks, especially after heavy rain or frost. Look out for any loose spots or water pooling, sorting these quickly prevents bigger problems later. A well-installed resin-bound slope should last years with proper care, providing safe, attractive access whatever the weather.
Key Takeaways
Essential Guidelines for Resin-Bound Gravel on Slopes
- Your ground slope must fall between 1:12 and 1:40 – think of a gentle driveway incline rather than a steep hill for best results.
- Check the site properly before you start. Look for any dodgy ground, sort out water drainage, and make sure your base is rock-solid.
- Choose quality, grippy stones – the sort you’d want on your own drive. They’ll help with both foot traffic and water run-off.
- Don’t skip the primer coat – it’s crucial for a proper bond. Keep an eye on moisture levels whilst laying, or you’ll end up with a botched job.
- Smart safety’s a must. Your team needs proper gear, especially on steeper bits. Hard hats and grip-soled boots aren’t optional.
Understanding Slope Suitability for Resin-Bound Surfaces
Choosing resin-bound surfaces? The slope of your ground matters hugely. Think of it like laying a carpet – whilst it works brilliantly on most surfaces, extremely steep gradients need special attention.
Most garden paths and driveways (typically between 1:12 and 1:40 gradient) are perfect for resin-bound systems, but anything steeper might need extra work. The key bits to check are: – Ground stability (no shifting soil underneath) – Proper drainage (water needs somewhere to go) – Base preparation (must be spot-on) to ensure optimal adhesion.
For steeper areas, like a sloping driveway, your installer might suggest additional grip additives or special installation techniques. A skilled UK contractor with resin experience will know exactly what’s needed – much like how you’d trust a specialist roofer for a complex roof job. Remember, proper installation is crucial for resin performance on slopes to ensure safety and longevity.
Whilst resin-bound surfaces are brilliant for most British weather conditions, getting the slope right from the start saves headaches later. Any decent installer should offer a free site assessment to check if your slope is suitable.
Importance of Ground and Substrate Preparation

Ground and Substrate Preparation: The Essentials
Proper ground preparation underpins every successful resin-bound gravel installation. Much like building a house, the foundation must be rock-solid. A well-prepared surface ensures your investment lasts and performs as expected. It is essential to consider the feasibility of installing resin driveways on slopes when preparing your ground to ensure the best possible outcome. Additionally, taking into account the British weather conditions during preparation is crucial to mitigate any potential future challenges.
Core Preparation Steps:
| Preparation Step | Importance |
|---|---|
| Stable Sub-base | Prevents sagging and surface failure |
| High-pressure Cleaning | Ensures proper bonding by removing dirt and debris |
| Drainage Assessment | Stops water collecting and damage |
| Primer Application | Creates strong surface bond |
| Moisture Management | Avoids bubbling and weak spots |
Common sense checks before starting:
- Surface must be bone-dry
- Check weather forecast (avoid rain)
- Test ground stability by walking the area
- Look for existing drainage issues
- Address cracks or damage in current surface
Getting these basics right saves time and money down the line. Think of it as painting a wall – skipping the prep work always shows through in the finished job.
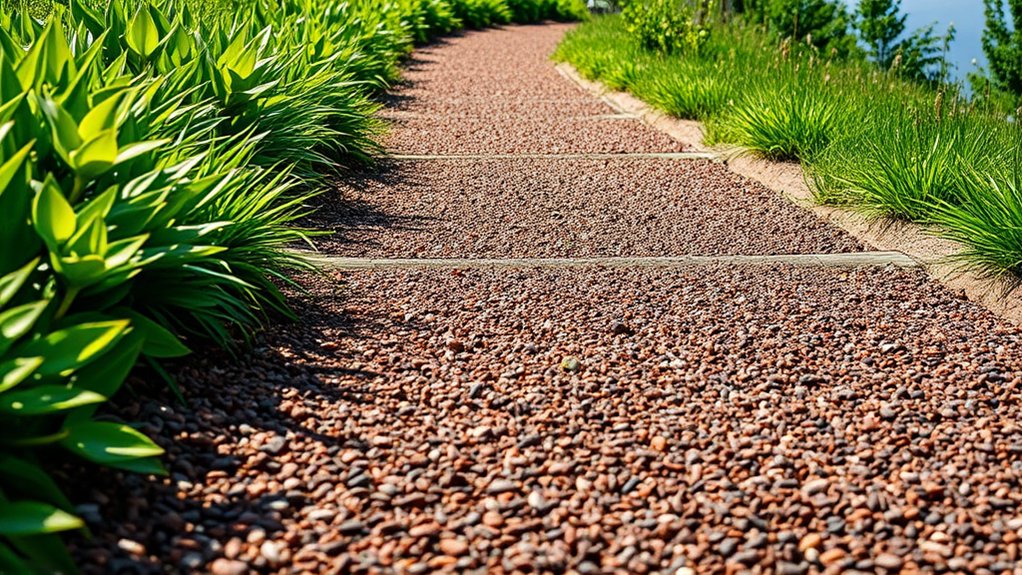
Selecting the Right Resin Mixture and Aggregate

Choosing the right resin mixture and aggregate proves vital for a lasting, practical resin-bound gravel surface, particularly on slopes. Four essential factors ensure top results:
- Resin Formulation: Pick a resin offering anti-slip qualities, UV protection and resistance to chemicals – think of it like choosing a robust outdoor paint that won’t fade or deteriorate.
- Aggregate Compatibility: Check your stones work properly with the resin – much like ensuring your mortar suits your bricks when building a wall.
- Texture and Size: Go for grip-friendly aggregates of the right size and shape. On slopes, angular stones about 2-5mm work brilliantly, similar to how winter tyres use special treads for better grip.
- Permeability: Use aggregates that let water drain through easily. Think of it as creating thousands of tiny drainage channels, rather like a well-designed garden soil structure. Additionally, selecting aggregates from brands like GCL Products ensures you receive options that are both aesthetically pleasing and of high quality.
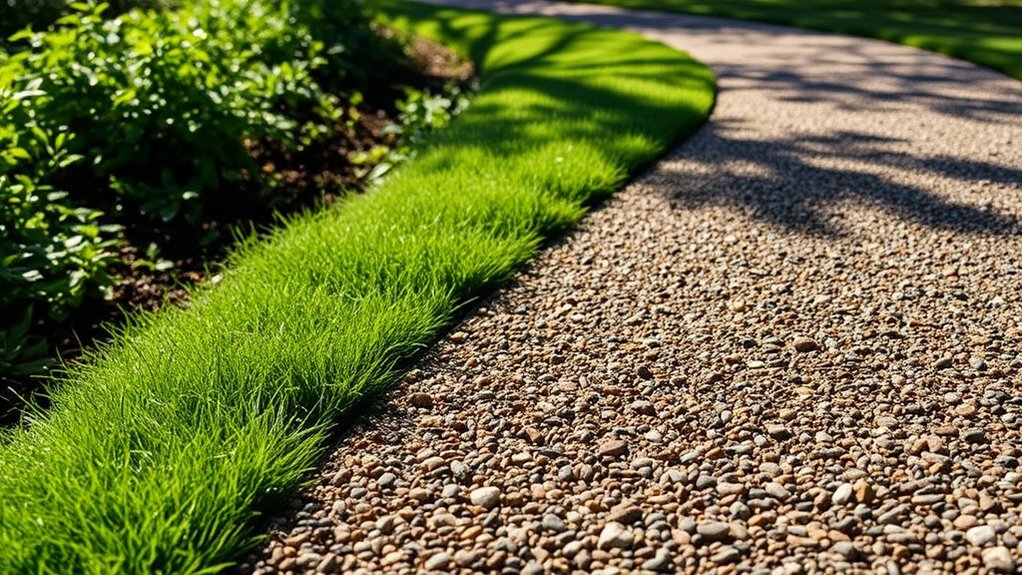
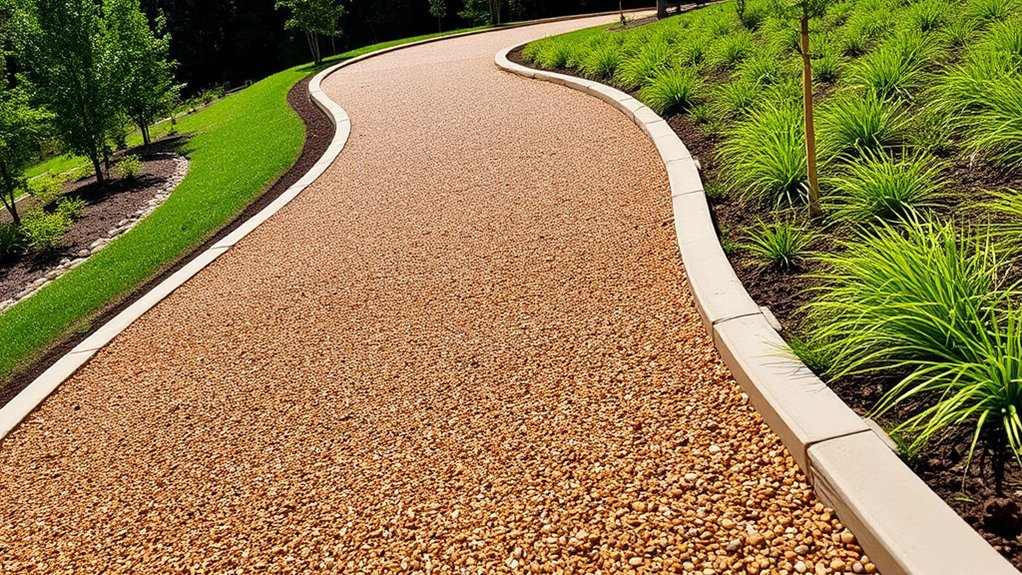
Effective Drainage and Water Management Strategies
Proper drainage and water management are vital for resin-bound gravel surfaces, particularly on slopes.
First, assess the slope’s gradient and ensure your sub-base drains well, using high-quality porous materials that let water soak through.
Install drainage channels along slope edges to catch excess water, stopping puddles and erosion.
Shape gradual slopes to manage water flow sensibly – think of water like traffic, needing a clear path without bottlenecks.
A bit like keeping gutters clear at home, you’ll need to check regularly for leaves and debris that might block drainage.
Sort out any worn patches quickly.
These practical steps will keep your surface safe, meet UK regulations and last longer.
Unlike traditional concrete or tarmac, resin-bound surfaces need this extra attention to water management, but it’s worth the effort for a permeable, long-lasting finish.
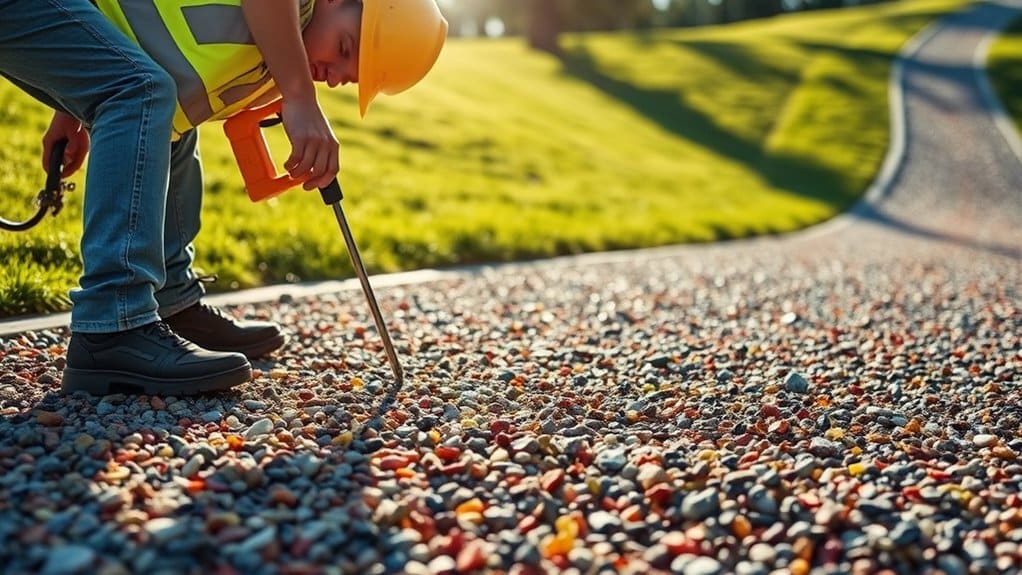
Installation Techniques for Sloped Applications
Proper installation of resin-bound gravel on slopes requires careful attention to three key areas.
First, thorough surface prep is essential – ensure the base is clean, stable and properly primed to prevent slippage.
Second, mix the resin thoroughly until you achieve a thick, toffee-like consistency that won’t run downhill.
Third, work in small sections from bottom to top, much like painting a fence, to maintain control and achieve an even finish.
Think of it as building layers on a wedding cake – each section needs to be perfect before moving higher.
Surface Preparation Essentials
Essential Surface Prep for Resin-Bound Gravel
Getting the surface right is crucial before laying resin-bound gravel, particularly on slopes where movement could be an issue.
Four key steps ensure a proper foundation:
- Check the slope – Make sure it’s not too steep. A gentle gradient (like a typical residential driveway) works best.
- Look over the base – Much like checking your garden path for cracks, examine the surface for any weak spots or uneven areas.
- Level properly – Create an even slope for water to run off naturally, similar to how a well-laid patio prevents puddles.
- Clear thoroughly – Sweep away all loose bits and rubbish. Think of it like preparing a wall before painting – the cleaner the surface, the better the finish.
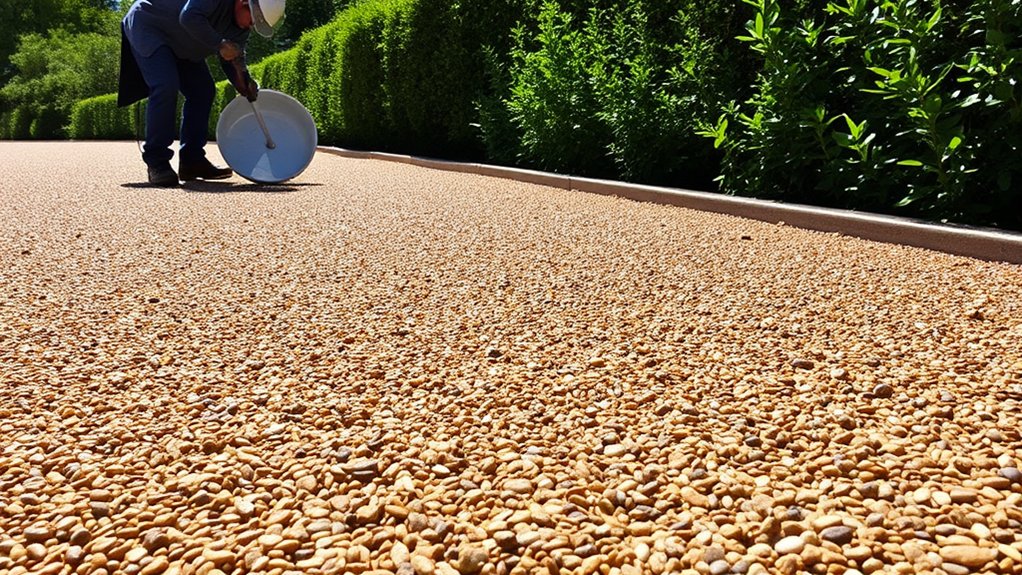
Proper Mixing Techniques
Proper mixing is crucial for lasting resin-bound gravel on slopes. Start with quality resin – it’s worth spending a bit more as it makes all the difference to how well it sticks and lasts.
You’ll need a forced action mixer (like the ones you’d see on building sites). Mix Part A for about 15 seconds before adding Part B until you’ve got an even colour throughout.
Keep an eye on the weather – if it’s particularly hot or cold, you’ll need to adjust your mixing time. Think of it like mixing cake batter; you want it just right.
Choose sharp-edged stones rather than smooth ones, as they grip better. Using different stone sizes (say, 2-5mm) gives you better texture and helps prevent slipping.
Stick to the manufacturer’s mixing ratios precisely – this isn’t the time for guesswork. Check the mixture regularly; it should look uniform, like wet sand.
Getting these basics right means your slope installation will be solid and reliable.
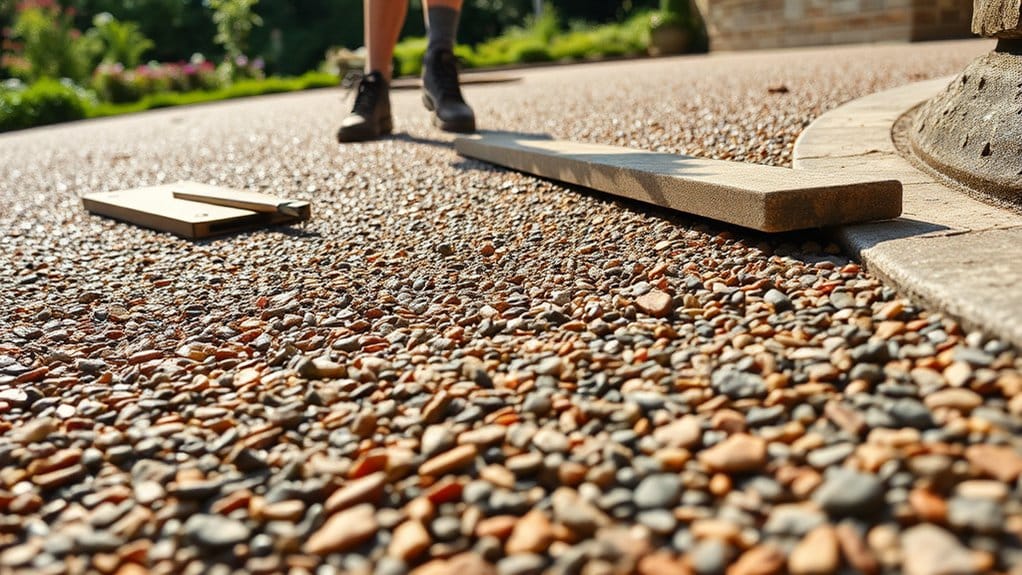
Accurate Application Methods
Accurate Application Methods
Proper application methods make all the difference when laying resin-bound gravel on slopes. Follow these key steps:
- Slope Assessment: Take precise measurements of your slope angle – this determines how you’ll tackle the installation.
- Layer-by-Layer Approach: Work the resin-bound mixture up the slope in small sections. Think of it like icing a cake – thin, even layers work best.
- Anti-Slip Add-ins: Mix in granite chips or similar aggregates for extra grip. Essential for slopes steeper than 1:15.
- Solid Base Prep: Your foundation must be properly compacted. A wobbly base means a failed surface – no shortcuts here.
These methods work particularly well for British weather conditions, where proper drainage and grip are crucial year-round.
Ensuring Professional Expertise in Installation
Professional expertise is vital for resin-bound gravel installation, particularly on sloped areas where accuracy is crucial.
Proper safety measures must be followed to protect both workers and ensure the surface’s long-term quality.
A skilled installation team from a reputable UK firm will deliver lasting results and an attractive finish that meets British standards.
Importance of Experience
The Right Experience Makes All the Difference
Professional resin-bound gravel installers bring vital expertise to your project through:
- Proper Training: Thorough knowledge of application methods and material handling, much like a master craftsman.
- Real-World Know-How: Years of hands-on work means they’ve tackled various site conditions – from uneven ground to tricky weather.
- Industry Certification: Quality assurance through recognised UK trade bodies and manufacturer accreditations.
- Up-to-Date Knowledge: Regular training on new techniques and products ensures your surface meets current British standards.
Think of it like getting a skilled mechanic for your car – the right expertise prevents problems and ensures lasting results.
Safety Protocols Compliance
Professional resin-bound gravel installation requires more than technical know-how – it demands strict safety measures. Ensure your team receives proper safety training to spot potential hazards on site. Essential PPE includes safety goggles, protective gloves and steel-toe boots – much like you’d expect on any UK building site.
Before starting work, check ground conditions: the surface temperature and moisture levels must be suitable for proper curing. Just as you wouldn’t lay a patio in the rain, timing is crucial for resin work.
Clean the surface thoroughly and inspect for any cracks, similar to preparing for tiling. When mixing materials, stick to manufacturer-specified ratios and use guarded mechanical mixers.
For sloped areas, which are common in British gardens, conduct thorough risk assessments. Regular safety checks help ensure compliance with UK regulations and HSE guidelines.
Remember: cutting corners on safety often leads to costly mistakes – both in time and money.
Regular Maintenance for Longevity on Slopes

Regular maintenance is vital for long-lasting resin-bound gravel on slopes across the UK. A proper routine prevents common problems before they become serious issues:
- Routine Cleaning: Brush off leaves and debris regularly. Use a standard garden hose for gentle washing – avoid pressure washers which might damage the surface.
- Drainage Management: Check drains monthly, especially after autumn leaf fall. Give extra attention following heavy British rainfall to ensure water flows properly.
- Anti-Slip Maintenance: Renew anti-slip treatments every 2-3 years – particularly important for our wet climate. Check surfaces carefully after winter frosts.
- UV Protection: Assess UV protection yearly, typically in spring. Look for any signs of surface breakdown or colour fading, common in exposed areas.
Regular checks keep your installation safe and looking smart whilst protecting your investment.
Much like caring for a car, catching small problems early saves both time and money.
Addressing Surface Irregularities and Repairs
Spotting surface problems is vital before laying resin-bound gravel.
Check for dips, bumps and cracks across the entire area – these need sorting straightaway.
Sort out any dodgy spots with proper repairs, much like fixing a pothole in your driveway.
A solid, even base means your resin surface will last longer and look better.
Get the groundwork right, and you’ll avoid headaches down the line.
Identifying Surface Irregularities
Surface Irregularity Checks for Resin Driveways
Proper inspection of surface irregularities is vital for resin-bound gravel installations, particularly on slopes. A detailed check ensures your driveway’s longevity and appearance.
Essential checks include:
- Walk the surface area, looking for obvious dips, bumps and cracks.
- Run a spirit level or straightedge across the surface to spot uneven areas.
- Take measurements with a surface gauge for precise readings.
- Pour water across suspect areas – it will naturally pool in problem spots.
A thorough check now prevents costly repairs later.
For steep driveways, pay extra attention to gradient changes, as these areas often reveal hidden surface problems.
Effective Repair Techniques
Tackling repairs on resin-bound gravel surfaces starts with a proper assessment of the damage.
First, clear away any loose stones without disturbing the base. Give the area a good clean and let it dry completely – this is crucial for a lasting fix.
Mix your repair materials (resin and stones) to match your existing surface. Think of it like touching up paint – you want an invisible blend.
Layer the mixture thinly, working the edges gently into the surrounding area.
For any cracks, a thorough clean followed by flexible resin filler does the trick.
Larger gaps might need extra reinforcement – much like filling a deep pothole in tarmac.
On slopes, don’t forget to factor in grip. A decent anti-slip treatment could save someone from taking a tumble.
Regular checks help spot issues early, especially after harsh weather spells typical in British winters.
Enhancing Safety With Anti-Slip Features

Four Ways to Improve Anti-Slip Safety on Slopes
Sloped surfaces can be treacherous, but proper anti-slip measures in resin-bound gravel make them safer:
- Add Grip Materials: Mix crushed glass and sand into your resin blend – it’s like adding grit to winter roads, creating better grip and strength.
- Top Layer Treatment: Sprinkle anti-slip PRO crushed glass before the resin sets. Think of it as non-slip tape for your outdoor surfaces.
- Correct Thickness: Install at least 18mm depth for driveways – anything less won’t provide enough grip or durability.
- Right Resin Mix: Use a minimum 7% resin-to-aggregate ratio. This ensures everything sticks together properly, much like having the right amount of cement in concrete.
These practical steps transform potentially dangerous slopes into secure, grip-friendly surfaces that work in all weather conditions.
Customization Options Without Compromising Performance
Resin-bound gravel systems offer various customisation options whilst maintaining top performance.
By adjusting resin flexibility, your surface can handle slight ground movement without cracking – particularly useful for British weather conditions.
Mix different aggregate sizes to create your desired look and feel; larger stones (say, 6-8mm) provide stability, whilst smaller ones (2-3mm) give a smoother finish.
For exposed areas like driveways and garden paths, UV-stable resins prevent yellowing and fading from our variable UK climate.
Permeable options help manage our frequent rainfall, whilst angular stones lock together better than rounded ones for improved stability.
Add non-slip aggregates for extra grip during wet weather.
Different finishing techniques, from smooth to textured, let you match your surface to its intended use – whether it’s a smart front drive or a practical back garden path.
These adjustments ensure your installation looks good and performs well, especially on slopes.
Frequently Asked Questions
What Are the Costs Associated With Resin-Bound Gravel Installation on Slopes?
Installing resin-bound gravel on slopes in the UK requires careful consideration of additional costs. The slope factor demands extra site preparation, proper drainage systems and specialist installation methods, all of which boost the overall price. A typical 30-degree slope, for instance, might need reinforced edging and enhanced sub-base work, adding roughly £15-20 per square metre to standard installation costs.
Can Resin-Bound Surfaces Be Installed in Cold Weather Conditions?
Resin-bound surfaces can be installed in cold weather, though careful consideration is required. Using specialist cold-weather resins and proper installation techniques ensures a durable finish even in lower temperatures. Most manufacturers recommend working in temperatures above 5°C for optimal results. If installation during colder months is essential, consult with your supplier about cold-weather-specific products and methods.
How Long Does It Take for Resin-Bound Surfaces to Cure?
Resin-bound surfaces need 6 to 48 hours to cure properly, with timing largely dependent on British weather conditions. In warmer summer months, your surface might be ready for foot traffic within 6-8 hours, whilst colder or damper conditions require longer curing periods. For best results, avoid walking or placing objects on the surface until fully cured – much like waiting for paint to dry on your garden fence. A properly cured surface will serve you well, preventing unwanted cracks and keeping your driveway or patio looking smart for years to come.
Are There Specific Regulations for Resin Installation on Sloped Areas?
Safety regulations for resin installations on slopes centre primarily on proper application guidelines and British Standards compliance. Check with your local council for specific requirements, as these protect both your investment and public safety. Common requirements include proper sub-base preparation, adequate drainage provisions and appropriate slip resistance ratings, particularly crucial for sloped areas.
What Warranties Are Available for Resin-Bound Surfaces on Slopes?
Warranty coverage for resin-bound slopes varies across UK suppliers and installers. Most reputable companies offer 5-10 year guarantees, though these typically depend on three key factors: the resin quality (such as UV-stable varieties), professional installation standards, and proper maintenance like annual cleaning. Think of it like a car warranty – you’ll need to follow the maintenance schedule to keep it valid.
Standard warranties generally cover:
- Surface cracking
- UV damage
- Material defects
- Drainage performance
It’s worth noting that steeper slopes may have more limited warranty terms, particularly for gradients above 15 degrees. Always get the specific warranty details in writing before work begins.
Conclusion
To round off your resin-bound gravel project on slopes, proper planning is essential. Following installation guidelines ensures both an attractive finish and a practical, grip-friendly surface that lasts. Think carefully about your design choices whilst keeping durability in mind – much like choosing the right tyres for British weather. Regular upkeep will keep your installation sound, turning tricky slopes into usable outdoor spaces for the long term.