A standard resin-bound gravel quote in the UK typically covers UV-resistant resin, selected aggregates and clean-washed stones. Essential installation kit includes industrial mixers, specialist trowels and required safety gear. The vital groundwork preparation ensures proper drainage through a solid sub-base. Optional extras might feature edging details and protective sealants. Labour costs vary based on site access and project complexity, whilst material choices affect the final price. Most installers include a breakdown of these components, making it easier to understand exactly what you’re paying for.
Key Takeaways
Core Elements of a UK Resin-Bound Gravel Quote:
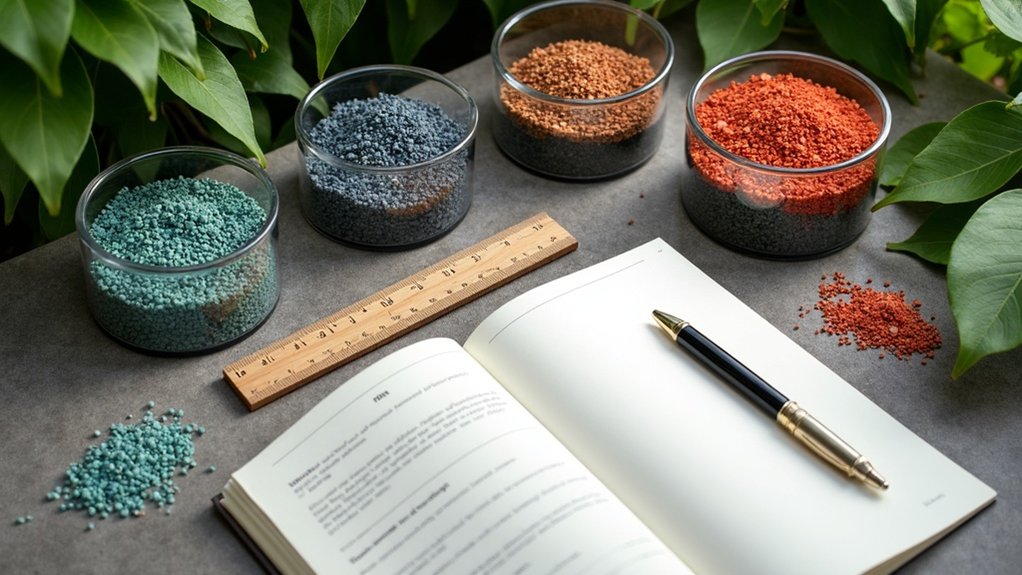
- Essential materials: UV-stable resin, specially selected aggregates and pre-washed stones (crucial for proper bonding)
- Professional kit: Industrial mixers, specialist trowels and required safety equipment
- Ground preparation: Covers excavation work and MOT Type 3 sub-base (similar to what’s used in British driveways)
- Finishing touches: Costs for border edging, decorative features and protective sealants
- Contingency costs: Accounts for waste materials and any extra labour needed for tricky areas
Each quote typically varies based on your driveway or patio size, site access and ground conditions. Most UK installers will include a detailed breakdown of these elements, much like getting a quote for block paving or tarmac.
Materials Included in the Installation Quote
Essential Materials in Your Resin-Bound Gravel Quote
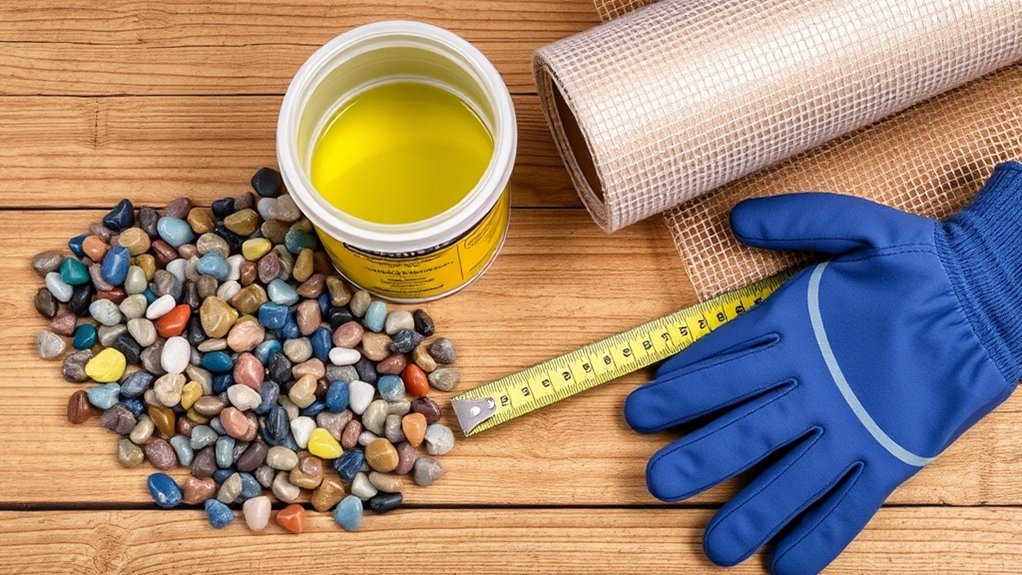
Your resin driveway quote should detail all crucial materials for a proper installation. The main component is the resin itself – typically a two-part epoxy or polyurethane that bonds the stones together. Always check for UV-stable resin to stop discolouration in sunny weather. The quote should list aggregate sizes (usually 1-3mm) and types. Common choices include local pea gravel or granite, which are vital for strength and bonding in the installation process. These stones come pre-washed to stick properly to the resin. Standard installation materials include: – Mixing equipment – Squeegees and trowels – Edge restraints – Geotextile membrane for drainage. Make sure your quote specifies all these items – they’re vital for a lasting finish. Additionally, it’s important to include MOT Type 1 aggregate as it provides an excellent load-bearing capacity for the base layer. If anything’s missing, query it with your installer before work begins.
Base Preparation and Requirements
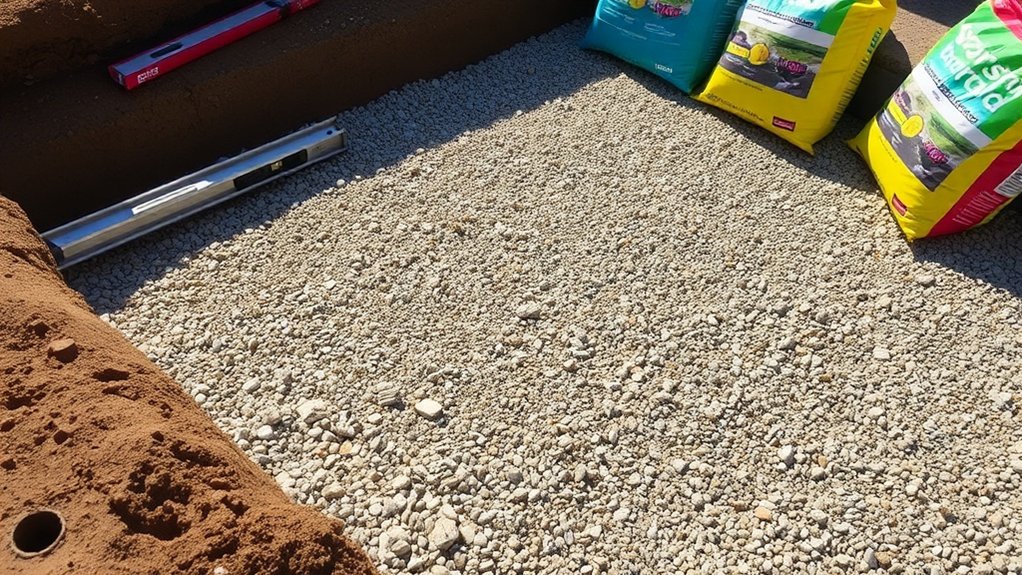
Proper base preparation is essential for a lasting resin-bound gravel surface. Dig out to at least 100mm depth and fill with MOT Type 3 sub-base, which prevents frost damage and ensures good drainage. It is vital to ensure compliance with UK drainage standards to prevent water pooling. Remove all plant matter and rubbish from the area, then compact the sub-base thoroughly in stages – much like building up layers of a cake. Lay a geotextile membrane underneath to stop weeds coming through. The surface must be completely level, like a snooker table, and strong edging should be fitted around the perimeter to hold everything in place. Watch the moisture levels during installation – too much or too little water will affect how well the resin bonds. Think of it like making concrete: the right moisture balance is crucial for strength. Maintaining a minimum depth of 100mm for the sub-base is essential to provide effective support and stability. These foundations might seem fussy, but they’re as important as good footings for a house. Get them right, and your resin-bound surface will stay smart and stable for years.
Labor and Installation Process
Begin your labour by properly excavating and preparing the base – this step is crucial for a sturdy foundation. Preparing the base ensures that the surface is clear of debris and properly compacted before installation. It is essential to use MOT Type 1 or crushed stone to create a solid foundation before mixing and applying the resin-bound gravel with care, much like frosting a cake, ensuring even coverage throughout. Finish the surface with proper techniques to achieve an attractive, long-lasting result. Think of it as polishing a car; the final touches make all the difference to both looks and durability.
Excavation and Base Preparation
Proper excavation and base prep are vital for a lasting resin-bound gravel surface. Start by digging out the existing ground to the correct depth, allowing for both drainage and the resin layer thickness. Remove all plant matter and rubbish to keep the base clean.
Next, lay a geotextile membrane followed by MOT Type 1 stone – much like preparing a standard driveway base. Compact the stone thoroughly with a whacker plate, similar to setting a patio foundation. Give it another good tamping and check it’s properly level.
Think of it as creating a solid platform that won’t sink or shift under cars or foot traffic.
Finally, fit edge restraints (like metal or concrete edging) around the perimeter to hold everything in place. These should match your planned layout for neat, tidy borders.
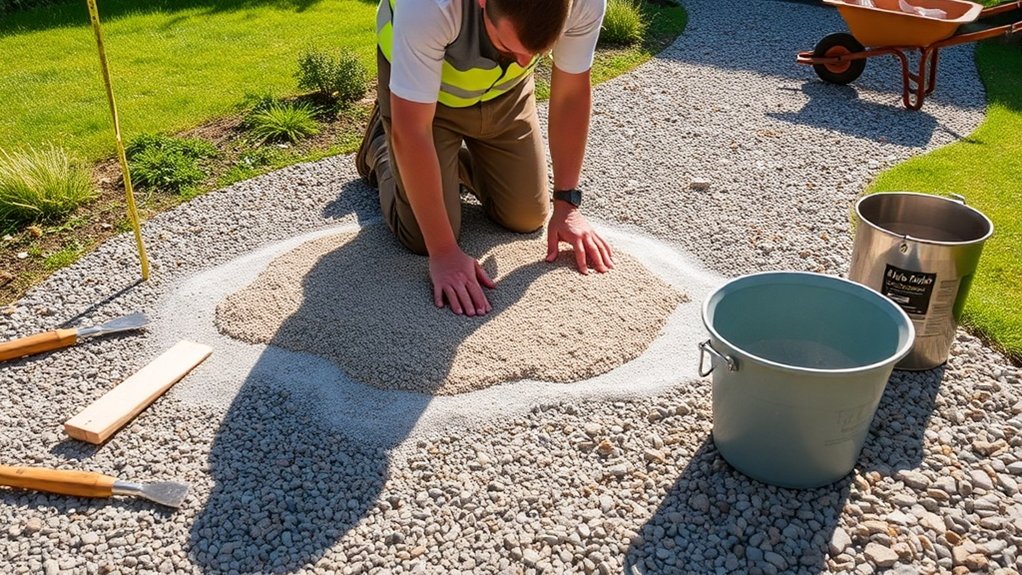
Mixing and Application Techniques
Once your base is ready, mix and apply the resin-bound gravel correctly to ensure a lasting, attractive finish.
Use a forced-action mixer to combine the resin and aggregate thoroughly – much like mixing concrete. Follow the manufacturer’s resin-to-aggregate ratios precisely, working in small batches to avoid early setting.
Complete the mixing and spreading within 10-15 minutes. Only apply in dry weather when temperatures are above 10°C.
Pour the mixture methodically onto the base and spread evenly with a trowel to 15-20mm thickness – about the height of two pound coins stacked together.
Add any decorative elements during this stage.
Surface Finishing Methods
Surface Finishing Methods for Resin-Bound Gravel
Creating a top-quality resin-bound gravel surface boils down to proper technique and timing:
- Surface Preparation: Your base must be spotlessly clean, dry and properly primed – much like painting a wall, the foundation matters.
- Smoothing: Work quickly with trowels and rollers to spread the mixture evenly, removing excess material before it sets.
- Finishing: Add a protective sealant to shield against British weather and daily wear.
- Curing: Leave for 24 hours in dry conditions – about the same time it takes for good quality paint to dry properly.
These steps aren’t just about looks – they’re essential for creating a lasting, water-permeable surface that stands up to British weather conditions.
Equipment and Tools Included
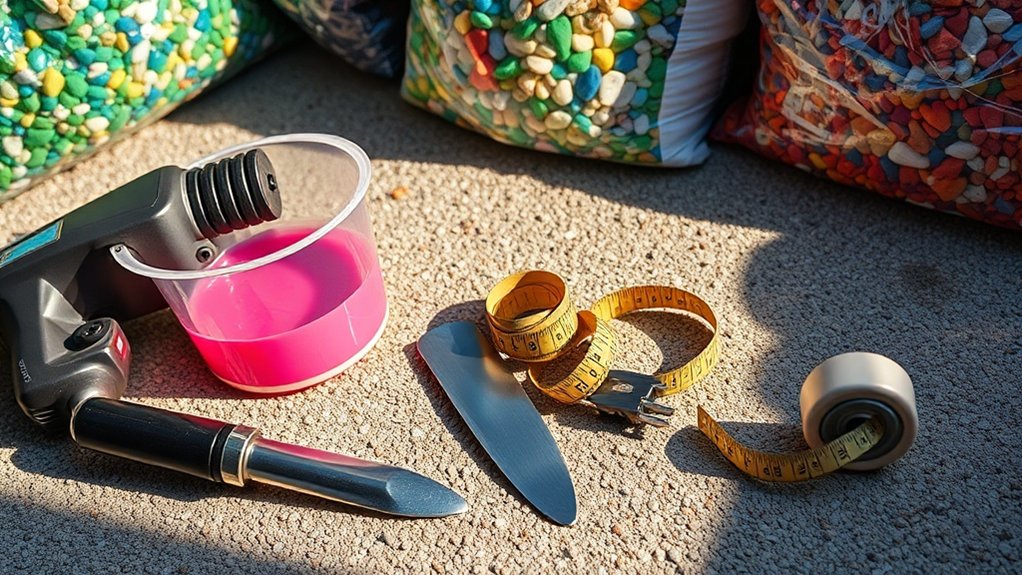
Essential Tools for Resin-Bound Gravel Installation:
Primary mixing equipment:
- Electric paddle mixer (850W, 240V)
- Drill with large plaster paddle
- Forced action mixer for aggregate blending
Application tools:
- Steel trowels and spatulas
- Screed sledges
- Floats for levelling
- Rollers or plate compactor
Safety equipment:
- Heavy-duty gloves
- Safety goggles
- Dust mask
- Steel toe-capped boots
Proper tools ensure a professional finish and make the job significantly easier.
Quality equipment, whilst initially costly, proves worthwhile for durability and consistent results.
Project Size and Coverage
Calculating your project’s surface area requires measuring both dimensions and planned resin depth.
Proper measurements ensure you order the right amount of materials – for example, a coffee table top of 1m x 0.5m would need different quantities than a kitchen worktop.
Getting these sums right helps avoid running short or wasting expensive resin whilst ensuring an even finish throughout.
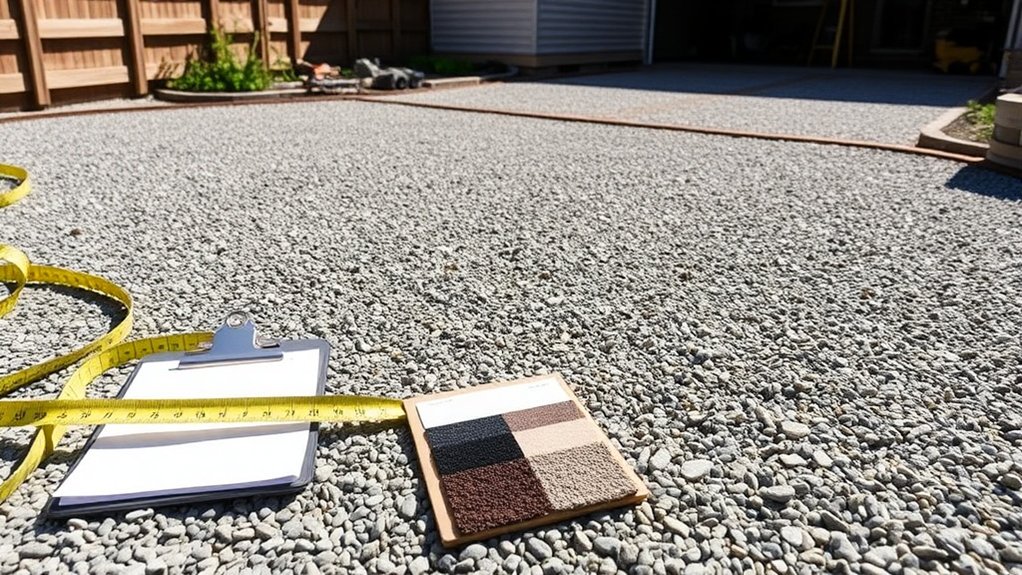
Surface Area Estimation
Surface Area Estimation
Getting your surface area right is crucial for resin-bound gravel projects – it affects both materials needed and costs. Follow these straightforward steps for accurate measurements:
- Precise Measurements: Use a decent measuring tape or laser measure for spot-on length and width figures.
- Mark Your Space: Pop some markers down at your project edges to double-check measurements.
- Split Tricky Areas: Got an odd-shaped space? Break it into simple rectangles or squares for easier sums.
- Material Needs: Each resin kit typically covers 3.5 to 4 square metres. Add 5-10% extra for spillage and waste – better to have a bit too much than run short.
Depth Thickness Considerations
The right depth and thickness are vital for a lasting resin-bound gravel surface. For footpaths and patios, apply 15-18mm of resin, whilst driveways need 18-20mm to handle vehicles.
When working around trees or on unstable ground, increase the depth to 30-40mm to prevent dips and sinking.
Keep the layer even throughout, particularly on larger surfaces, as variations can create weak spots. For standard 3-6mm aggregates, never go below 18mm thickness.
Cutting corners on depth often leads to cracks and expensive fixes down the line.
Think of it like laying a foundation – skimp on the basics, and you’ll pay for it later.
Getting the depth right from the start ensures your resin surface performs well for years to come.
Waste Calculation Factors
Waste Calculation Factors
Understanding waste factors proves crucial when planning resin-bound gravel installations across the UK. Key points to consider:
- Project Size: Larger areas, such as car parks, produce less waste as bulk mixing becomes more efficient. A 100m² driveway typically generates less waste than five separate 20m² paths.
- Shape Complexity: Awkward shapes and obstacles like garden features boost waste by 10-15%. A straightforward rectangular driveway needs less material than one with curved edges or tree cut-outs.
- Measurement Accuracy: Precise measurements make or break a project. A mere 10cm error across a large area could mean ordering several extra bags of resin and aggregate.
- Surface Conditions: Uneven ground and rough subbases require additional material. An old, bumpy concrete base might need 15% more material than a smooth, newly-laid one.
These factors directly affect your material costs and project timeline – best to account for them during the planning stage.
Additional Costs and Services

Additional Costs and Services
When planning your resin-bound gravel installation, you’ll need to factor in extra costs that affect your total budget. Common additional charges include:
| Service | Description | Estimated Cost |
|---|---|---|
| Decorative Elements | Patterns or colour blends | £160 – £650 |
| Edging and Borders | Installation of containment units | £120 – £480 |
| Surface Sealing Treatments | Enhancements for durability | £80 – £320 |
Site preparation might require levelling or drainage work, whilst material costs vary based on your chosen finish. Labour charges typically depend on your location and project complexity.
Understanding these costs upfront ensures proper budgeting and helps avoid unexpected expenses during installation.
Frequently Asked Questions
How Long Does a Resin-Bound Gravel Installation Typically Take?
The typical installation time for resin-bound gravel ranges from 2-7 days. A standard driveway usually takes 2-3 days, whilst larger projects like commercial car parks may require a full week. Weather conditions, ground preparation and pattern complexity all influence completion time – dry, mild weather is ideal for proper curing.
Can Resin-Bound Gravel Be Installed in Rainy Weather?
Installing resin-bound gravel in the rain simply won’t work. Rain interferes with the resin’s ability to bond properly with the stone, much like trying to stick a plaster on wet skin. You’ll need completely dry conditions to achieve a proper, lasting finish. A botched installation could mean a crumbly surface within months, rather than the 15-20 years you’d typically expect from a well-laid resin driveway. Best to wait for a dry spell – it’s worth the patience.
What Maintenance Is Required After Installation?
Regular sweeping and occasional pressure washing keep resin-bound gravel in top shape. Remove any weeds as they appear, and tackle algae growth with specialised treatments suitable for resin surfaces. Skip harsh cleaning chemicals, as they may damage the resin binding. A well-maintained surface will look smart and last longer, protecting your investment.
Is Resin-Bound Gravel Suitable for Driveways?
Resin-bound gravel makes an ideal choice for UK driveways, bearing up well to daily car use and foot traffic. The system creates a smart, contemporary finish that boosts your home’s kerb appeal whilst requiring minimal upkeep. Just ensure it’s laid properly on a solid base for best results.
Are There Eco-Friendly Options Available for Installation?
Yes, eco-friendly options are readily available for your installation in the UK. Choose sustainable materials such as locally sourced aggregates and bio-based resins. Modern installation methods focus on minimal waste, proper drainage and efficient mixing techniques to reduce environmental impact. These green alternatives work just as effectively as traditional options whilst being kinder to the environment.
Conclusion
Getting a clear picture of your resin-bound gravel quote is vital before signing off on any work. A thorough quote should cover materials, groundwork, labour costs and machinery hire. Do check the fine print for extra charges and included services – it’s worth taking time to understand exactly what you’re paying for. A well-planned installation ensures you’ll end up with a smart, lasting surface that adds value to your property.