Installing a resin patio combines durability with aesthetic appeal. We’ll guide you through the process, from selecting materials to finishing touches.
First, prepare the surface thoroughly, ensuring it’s clean and level. Mix your chosen resin with aggregates, following manufacturer guidelines for precise measurements.
Apply the mixture evenly using a trowel, maintaining consistent thickness. Allow proper curing time, typically 24-48 hours for foot traffic.
Once cured, inspect for imperfections and apply a protective coating if needed. Regular maintenance involves simple sweeping and occasional pressure washing.
With the right approach, you’ll create a stunning, long-lasting outdoor space that enhances your property’s value. This guide covers everything you need to know for a successful installation.
Key Takeaways
- Prepare the surface by cleaning, repairing cracks, and ensuring proper moisture levels for optimal resin bonding.
- Mix resin components thoroughly with aggregates using a powerful drill and mixing paddle for uniform consistency.
- Apply the resin mixture evenly using a trowel, maintaining consistent thickness and working in small sections.
- Allow proper curing time of 24-48 hours for foot traffic and up to 14 days for full strength.
- Conduct a final inspection after curing and apply a protective coating for UV resistance and stain protection.
Understanding Resin Patio Basics
In recent years, resin patios have gained popularity as a versatile and attractive outdoor flooring option. We’ve seen a growing interest in this innovative surface due to its unique combination of functionality and aesthetics.
Let’s explore the basics of resin patios to help you grasp their benefits and installation techniques.
Resin patios are created by mixing natural aggregates with a clear resin binder, resulting in a smooth, permeable surface that’s ideal for outdoor use. This composition allows for efficient water drainage, reducing the risk of puddles and water damage whilst promoting groundwater recharge.
There are two primary types of resin patios: resin-bound and resin-bonded, each with distinct characteristics and installation methods. We’ll need to take into account different resin types, such as epoxy, polyurethane, and acrylic, each offering unique properties suited for varying environmental conditions and usage requirements.
One of the key advantages of resin patios is their customisability. We can select from a wide range of aggregate colours and sizes to enhance both aesthetic appeal and functionality.
When it comes to installation techniques, it’s essential to guarantee proper surface preparation and mixing ratios. The UV stability of resin patios ensures that they maintain their colour and appearance over time, contributing to their long-lasting durability.
Benefits of Resin Patios
We’ll explore two key advantages of resin patios: durability with low maintenance, and aesthetic appeal paired with versatility.
Resin patios offer exceptional longevity and resistance to wear, making them ideal for high-traffic areas whilst requiring minimal upkeep. These surfaces can withstand heavy loads of up to 400 tonnes per cm², making them suitable for both residential and commercial applications.
Their UV-stable properties and customisable designs, featuring various colours and aggregate sizes, guarantee these patios maintain their visual appeal over time whilst allowing homeowners to tailor their outdoor spaces to their preferences.
Durability and Low Maintenance
Resin patios stand out for their exceptional durability and low maintenance requirements, making them an attractive option for homeowners. These surfaces boast impressive weather resistance, withstanding cracking, fading, and discolouration over time.
Their colour stability is further enhanced by UV stability, ensuring the patio retains its aesthetic appeal even under harsh sunlight exposure. The unique formulation of resin patios, which includes natural stones and recycled materials, contributes to their flexibility and resistance to cracking, making them an ideal choice for outdoor spaces.
We’ve found that resin patios offer significant longevity, with a potential lifespan of 20-25 years when properly installed and maintained. This durability is complemented by the material’s permeable nature, which promotes effective water drainage. By reducing the risk of puddles and minimising potential water damage, this feature contributes to the patio’s long-term structural integrity.
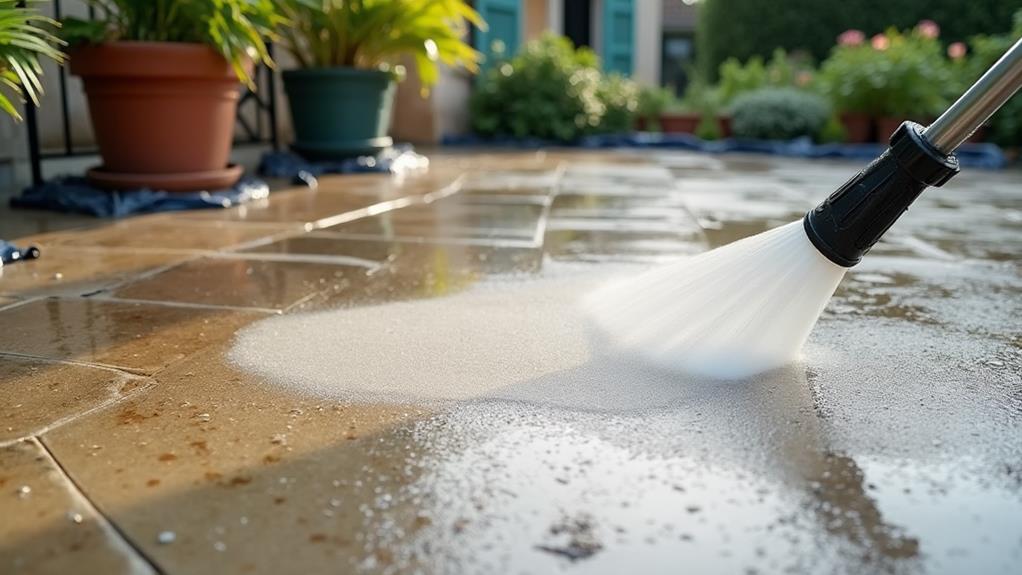
Maintenance of resin patios is remarkably straightforward. The surface resists weed growth and dirt accumulation, making routine care simple.
We recommend regular sweeping and occasional jet washing to keep your patio in top condition. This minimal upkeep, combined with the material’s inherent durability, translates to long-term value for homeowners.
When compared to traditional paving options, resin patios offer a compelling combination of longevity and ease of maintenance.
Aesthetic Appeal and Versatility
Countless homeowners are drawn to resin patios for their remarkable aesthetic appeal and versatility. We’ve found that resin patios offer unparalleled customisation options, allowing us to create stunning outdoor spaces that align with current design trends.
The variety of colours and aggregate sizes available enables us to craft unique combinations that complement any architectural style or landscape. These surfaces not only enhance kerb appeal but can also increase property value, making them a smart investment for homeowners. With a lifespan exceeding 25 years, resin patios provide long-lasting beauty and functionality.
We’re particularly impressed by the UV stability of resin patios, which guarantees that your chosen colour combinations remain vibrant and fade-resistant over time. This durability extends to the patio’s smooth finish, which not only contributes to its modern appearance but also enhances safety by reducing trip hazards.
The permeable nature of resin patios adds another layer of versatility to their design. We can create patios that effortlessly blend aesthetics with functionality, preventing water accumulation whilst maintaining a clean, dry surface. This feature is especially valuable in areas prone to heavy rainfall or flooding.
Whether we’re working on residential or commercial projects, resin patios provide the flexibility to meet diverse design requirements whilst offering long-lasting beauty and practicality. Their ability to withstand heavy foot traffic makes them an ideal choice for high-use outdoor areas.
Essential Tools and Materials
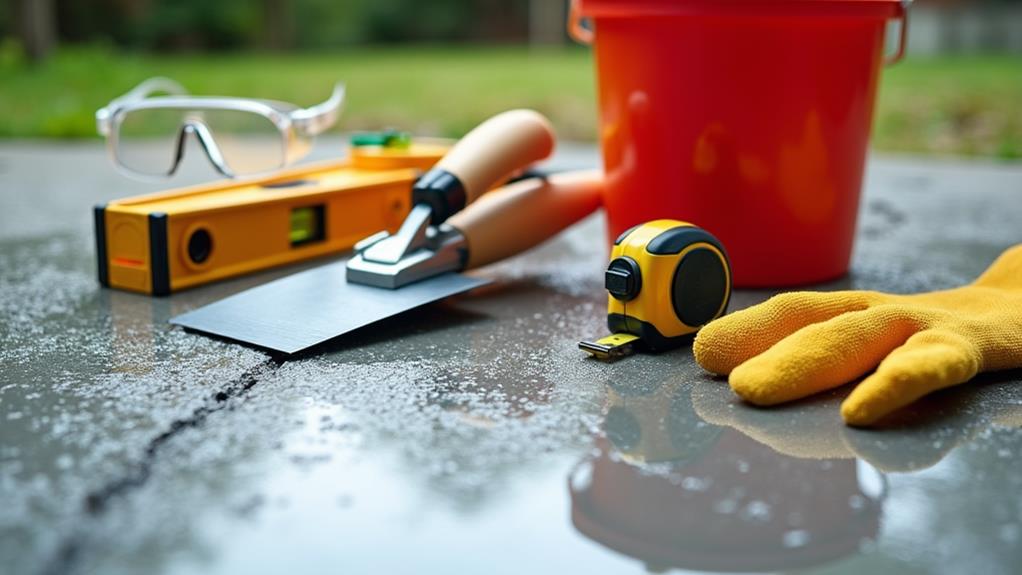
Before diving into your resin patio project, it’s vital to gather all the necessary tools and materials. We’ll guide you through the tool selection tips and material sourcing strategies to guarantee you’re fully prepared.
Let’s start with the essential tools:
| Tool | Purpose |
|---|---|
| Trowel | Spreading resin mixture |
| Mixing container | Combining resin and aggregates |
| Safety gear | Protecting yourself during installation |
| Plasterer’s drill | Achieving homogenous mixture |
| Measuring tools | Accurately gauging material amounts |
For materials, focus on high-quality aggregates in various sizes and colours. Verify they’re clean and dry for maximum adhesion. Don’t forget to include resin filler for repairs, sandpaper for smoothing, and a UV-protective sealant.
When sourcing materials, prioritise reputable suppliers to assure quality. Consider bulk purchasing for cost-effectiveness, especially for larger projects. Remember, the right tools and materials are vital for a successful resin patio installation.
We recommend investing in a plasterer’s style drill with a mixing paddle for the best results. This tool guarantees even distribution of resin and aggregates, leading to maximum bonding. By following these tool selection tips and material sourcing strategies, you’ll be well-equipped to create a stunning and durable resin patio.
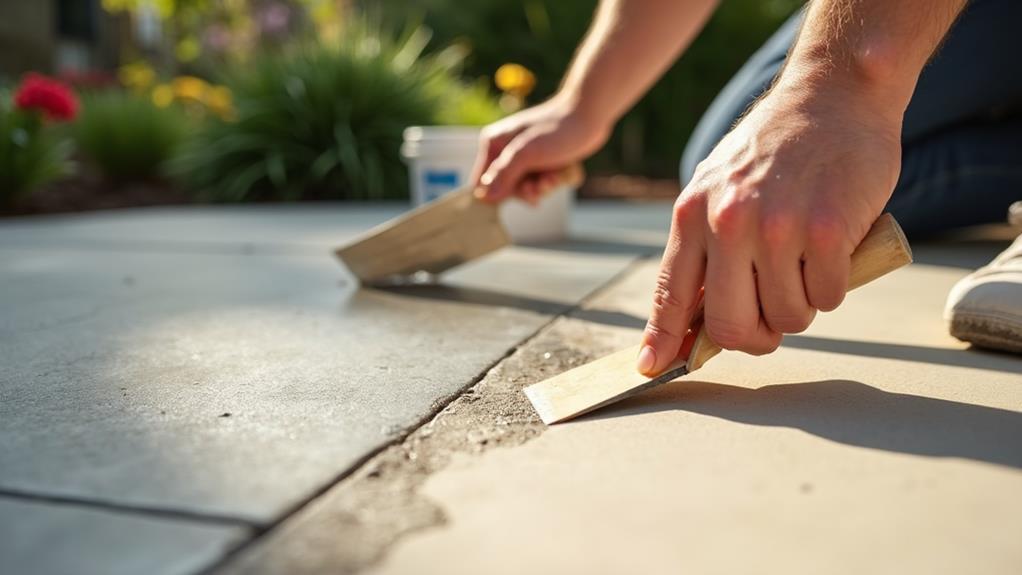
Surface Preparation Techniques
Three essential steps form the foundation of successful surface preparation for your resin patio: area assessment, thorough cleaning, and moisture evaluation.
We’ll start by verifying the selected area is stable and level. Remove any obstacles and check for adequate sunlight exposure to prevent future ground shifting. This step is critical for surface stability.
Next, we’ll focus on cleaning the surface meticulously. Remove all debris, level the ground, and repair any existing cracks. This creates an ideal workspace for resin adhesion and guarantees a smooth finish.
Finally, we’ll assess moisture levels, particularly on concrete surfaces. A dry surface is perfect for efficient bonding with the resin. This moisture assessment is vital for the longevity of your patio.
To streamline your preparation process, keep these key points in mind:
- Mark out the application area with guidelines
- Use a powerful drill with a mixing paddle for uniform resin mixture
- Combine resin and hardener before adding aggregates
- Spread the mixture evenly to prevent air pockets
Mixing Resin and Aggregates
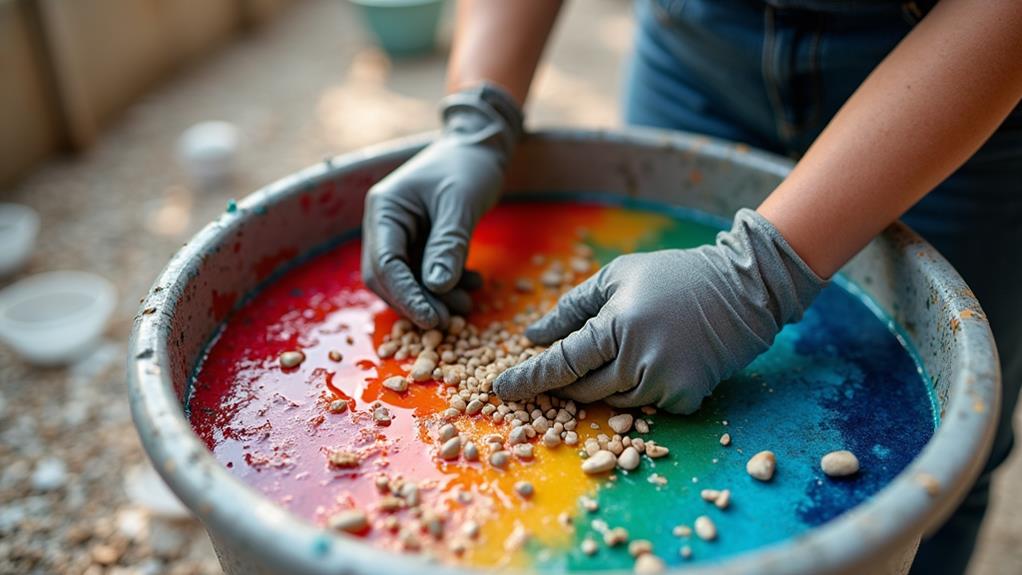
The mixing process begins with precise measurements and proper preparation. We’ll start by pouring one-third of the stone aggregate into a clean, dry bucket and setting it aside. This ensures we maintain an adequate mixture ratio throughout the process.
Next, we’ll create a shallow well in the remaining aggregate within the mixing tub. This step facilitates uniform mixing of the resin. In a separate bucket, we’ll combine the resin components (A and B), mixing them until they achieve a uniform colour. This is essential for consistent resin types and ideal bonding.
Once the resin is thoroughly mixed, we’ll combine it with the aggregates. It’s important to confirm all stone aggregates are completely coated with the resin mixture. This coating is crucial for ideal bonding and surface strength.
Throughout the mixing process, we’ll maintain consistency in our mixing techniques.
For different finishes and desired aesthetics, we may consider using SUDwell kits. These kits offer various resin types and mixing techniques to achieve specific looks.
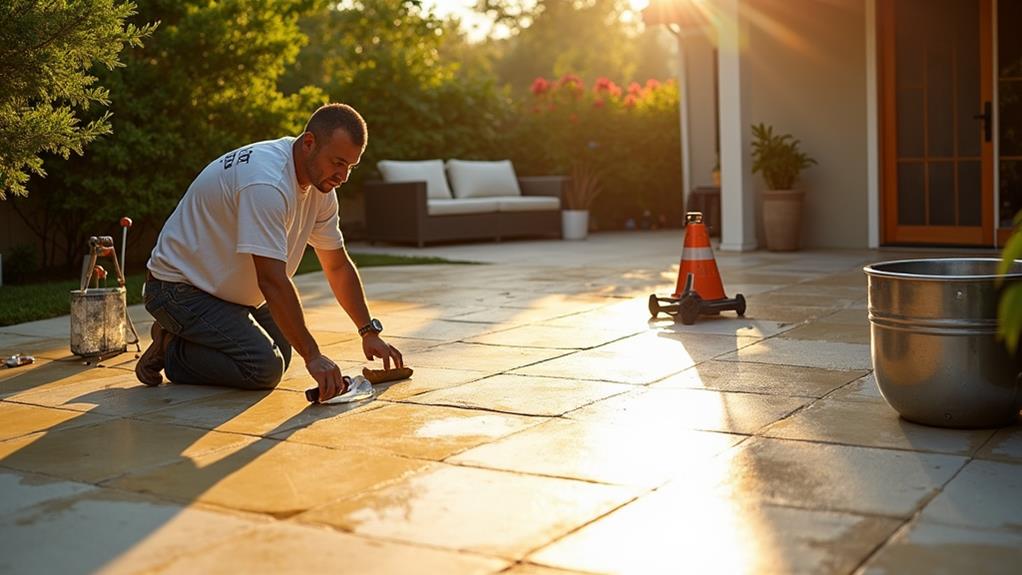
Application Process Step-by-Step
Now that we’ve mastered the mixing process, let’s focus on applying the resin mixture to create your perfect patio. The application process is vital for achieving a durable and attractive finish.
We’ll start by spreading the mixture evenly over the prepared surface using a trowel. It’s important to maintain a consistent thickness and minimise air pockets throughout the application.
Key application techniques and common mistakes to avoid:
- Use smooth, sweeping motions with the trowel to guarantee even distribution
- Work in small sections to prevent the mixture from setting before you’ve finished
- Avoid overworking the surface, which can lead to an uneven finish
- Be mindful of the working time specified by the manufacturer
As we spread the mixture, we’ll aim for a smooth, level finish. This step requires patience and attention to detail.
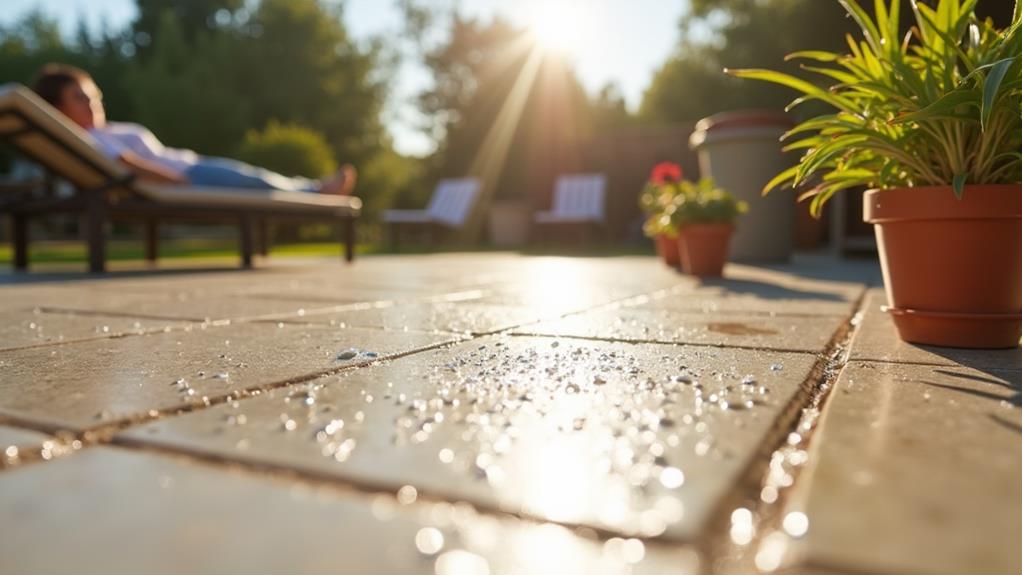
Curing and Finishing Touches
After applying the resin, we’ll need to allow for a curing time of 24-48 hours before permitting foot traffic, with full strength achieved in 7-14 days depending on weather conditions.
We must maintain ambient temperatures between 5°C and 25°C during this essential period for ideal results.
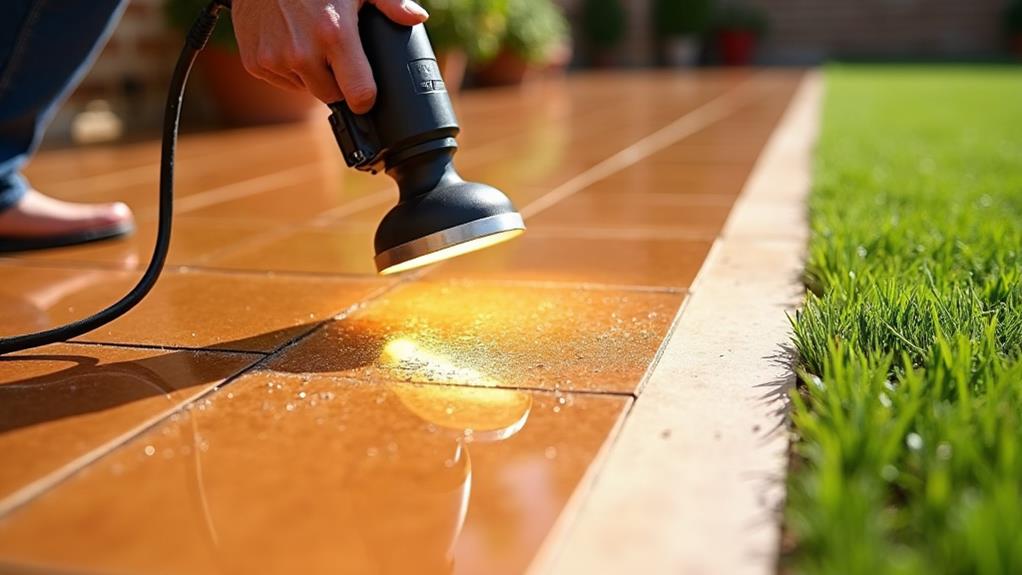
Once cured, we’ll conduct a thorough surface inspection, addressing any imperfections with light sanding and additional resin application as needed, before considering a final protective coating to enhance UV resistance and stain protection.
Curing Time and Conditions
Patience is key when it comes to curing your newly installed resin patio. We’ll need to allow 24 hours for foot traffic and up to 14 days for full strength, depending on the resin type and environmental conditions.
Ideal curing techniques require temperatures between 5°C and 25°C, with humidity below 80% to prevent bubbling or improper setting.
During the first 24-48 hours, it’s vital to:
- Keep the surface free from heavy foot traffic
- Protect from water exposure
- Prevent debris accumulation
- Lightly mist every 30-40 minutes to enhance adhesion
The environmental impact of curing conditions can’t be overstated. We must maintain the right temperature and humidity levels to guarantee proper setting. If conditions aren’t ideal, we may need to adjust our curing techniques accordingly.
After the initial curing period, we’ll continue to monitor the patio’s progress. Once fully cured, we’ll apply a sealant to protect against UV damage and maintain its aesthetic appeal.
Final Surface Inspection
A meticulous final surface inspection marks the vital last step in our resin patio installation process.
After allowing the resin mixture to cure for the manufacturer-specified duration, typically 24 to 48 hours, we’ll conduct a thorough examination of the surface.
We’re looking for any imperfections, ensuring the patio is smooth and level throughout. It’s essential to check for air pockets that may have formed during the curing process, as these need to be addressed before the resin fully sets.
If recommended, we’ll apply a sealing coat to provide additional UV protection and enhance the patio’s longevity.
This step helps minimise wear from weather exposure.
We’ll also pay close attention to the edges, ensuring they’re properly finished and blended with surrounding surfaces to prevent water pooling and maintain a seamless appearance.
Aftercare and Protection
The resin patio’s curing process demands careful attention to guarantee peak results. We must allow 24 to 48 hours for proper curing, depending on temperature and humidity. During this time, it’s vital to keep the surface free from moisture and debris to secure maximum adhesion.
After 72 hours, we can safely place furniture and other heavy objects on the patio.
To protect our newly installed resin patio, we’ll apply a sealant once curing is complete. This enhances UV resistance and guards against stains, preserving the patio’s appearance.
Regular maintenance is key for longevity. We recommend:
- Sweeping regularly to remove dirt and debris
- Hosing down the surface periodically
- Using appropriate aftercare products for cleaning
- Addressing spills promptly to prevent staining
Patio protection goes beyond initial curing and sealing. We’ll need to be mindful of potential damage from heavy objects, sharp edges, or extreme weather conditions.
Maintenance and Care Tips
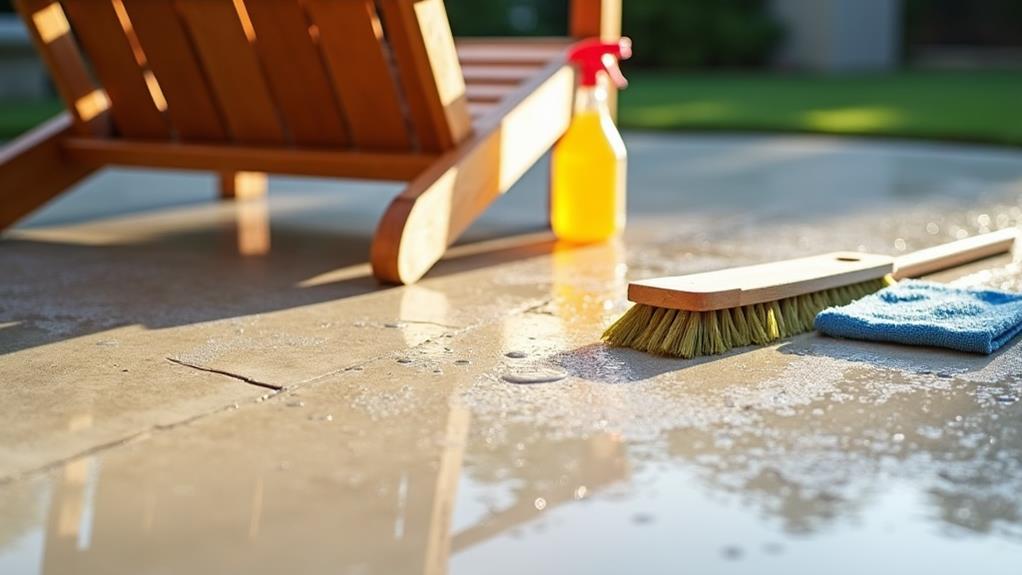
Maintaining your resin patio is vital for preserving its beauty and longevity. We recommend regular sweeping and hosing down to remove dirt and debris, preventing grime build-up and keeping your patio looking its best.
For tougher stains, we suggest using mild detergents that are safe for resin surfaces to avoid damaging the material.
To protect against UV damage and stains, we advise periodically sealing your resin patio. This not only extends the surface’s lifespan but also maintains its fresh appearance.
We encourage you to inspect your patio regularly for common issues like hairline cracks or discolouration. Addressing these problems promptly helps prevent further deterioration.
When it comes to repair methods, it’s important to have essential tools on hand. Keep resin filler, sandpaper, and mixing containers readily available to quickly address minor damages.
Frequently Asked Questions
How to Install a Resin Patio?
To install a resin patio, we’ll first select appropriate resin types and gather installation tools. We’ll prepare the ground, mix resin with aggregates, apply evenly, and allow curing. Regular maintenance ensures longevity. Let’s explore each step in detail.
What Is the Best Base for a Resin Patio?
Like a solid foundation for Troy, we recommend a stable base for your resin patio. We prefer concrete or compacted MOT type 1 as base materials. They’re durable, provide excellent drainage solutions, and guarantee long-lasting performance for your outdoor space.
Can I Lay a Resin Patio Myself?
You can lay a resin patio yourself, but it’s rather challenging. You’ll need specialised tools and precise measurements. Be aware of common mistakes like improper mixing or uneven spreading. Professional help might be wise for ideal results.
How Do You Prepare the Ground for a Resin Driveway?
We’ll begin by levelling the ground and implementing proper drainage solutions. We’ll clear debris, repair cracks, and compact a sub-base. Then, we’ll install kerbs and edgings. Finally, we’ll ensure a clean, dry surface for resin application.
Conclusion
We’ve covered every step of resin patio installation, from preparation to finishing touches. With proper technique, you’ll create a durable, attractive outdoor space. Interestingly, resin-bound surfaces can last up to 25 years with minimal maintenance. Remember to follow manufacturer guidelines for mixing ratios and curing times. Regular sweeping and occasional pressure washing will keep your patio looking pristine. By adhering to these technical details, you’ll guarantee a successful installation that enhances your property for years to come.